Friday, December 3, 2010

Caesar Salad


Whenever we go out to eat at a fancy restaurant, Michael orders the Caesar salad. His absolute favorite was one that he ate at a restaurant in Vancouver, Canada called Seasons in the Park. Ahh, the memories of delicious meals eaten while we lived in Vancouver. However, we no longer live in Vancouver, and even when we did live there, we couldn't eat out at an upscale restaurant every night. So back in our Vancouver pre-children days, I got on a salad dressing kick and experimented with home-made Caesar salad dressing. I came up with a pretty good dressing that Michael and I both liked. Then we moved back to the US and had kids. For a couple of years I didn't have time to make salad dressings, and I completely forgot about the homemade Caesar dressing that we had liked.

This summer I had a craving for Caesar salad, so I went to our local supermarkets to try to find a bottle of dressing that did not have any corn syrup or soybean oil, and ideally not much distilled vinegar either, since that comes from corn. I was so excited when I found one brand that fit those criteria. Unfortunately, when we tried it out on our Romaine lettuce, it tasted terrible. Fortunately, I remembered where I had put my recipe for homemade Caesar salad dressing. The recipe needed some tweaking to make it egg-free, but after several tries I have come up with the following recipe, which gets Michael's stamp of approval.

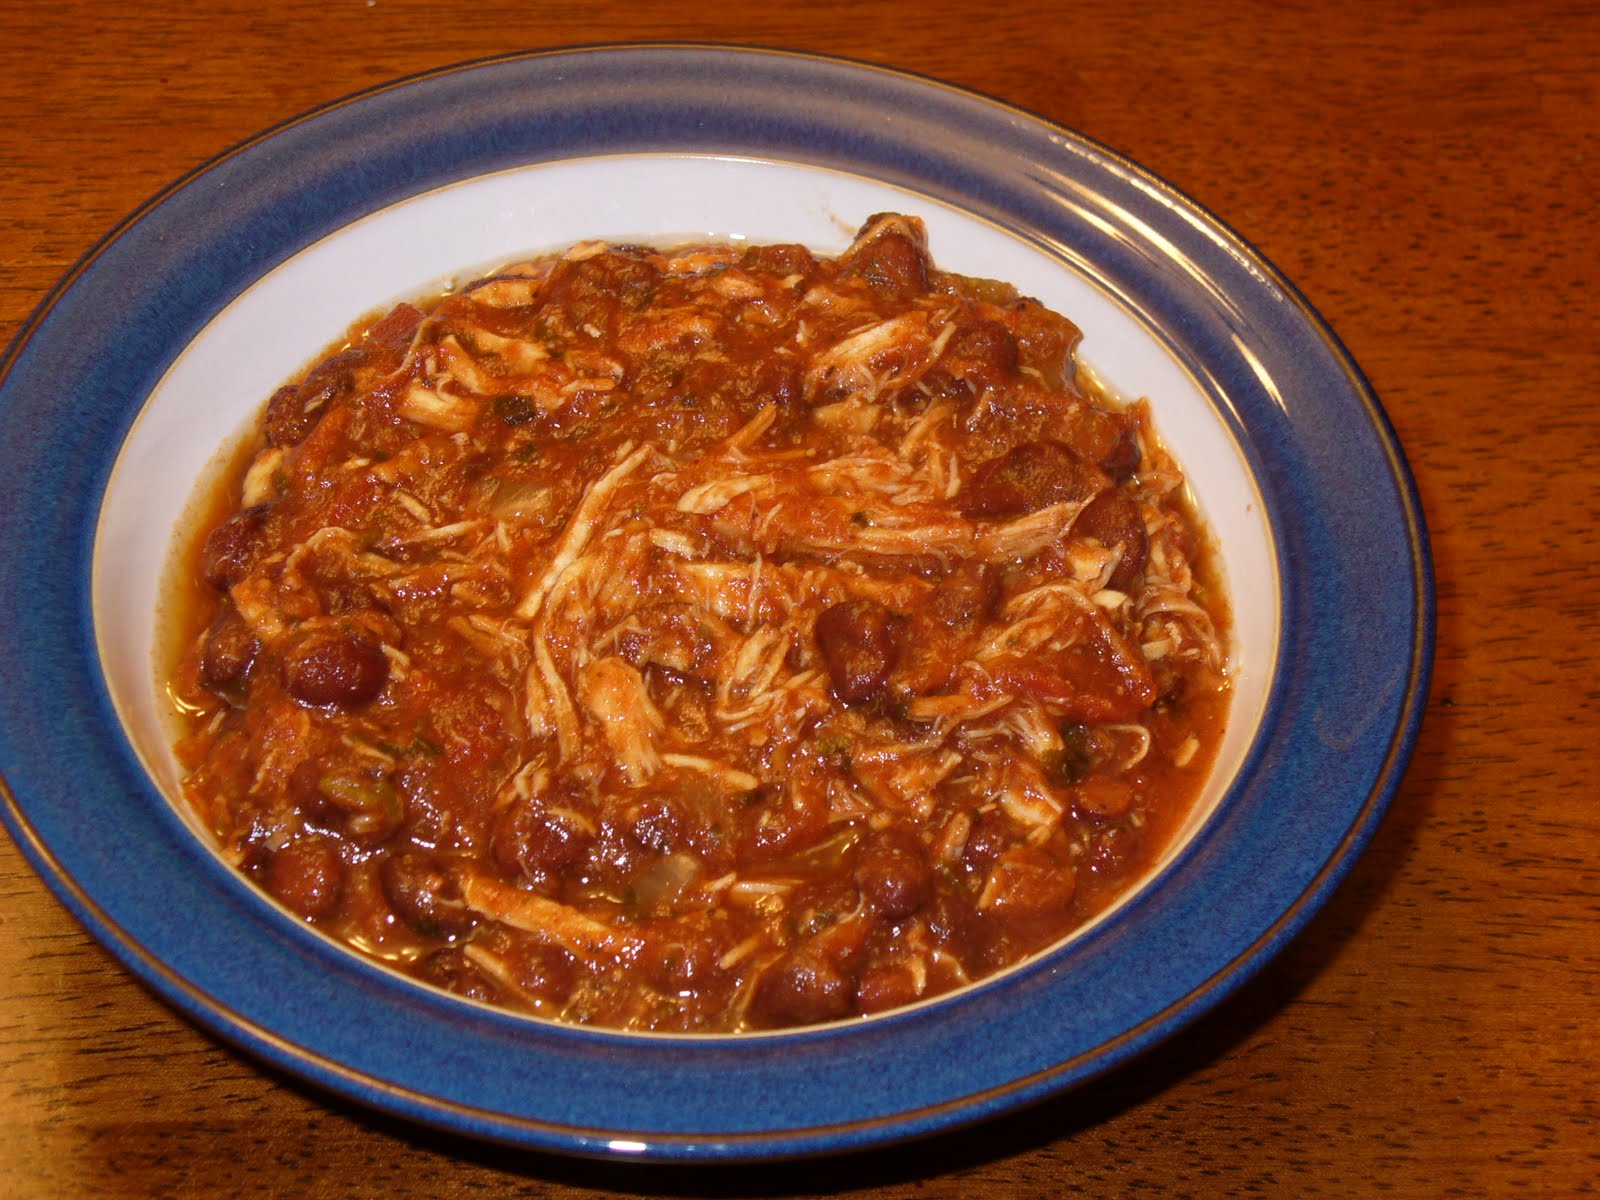
The picture above shows Caesar salad with capers. Unfortunately, all store-bought jars of capers that I have come across so far seem to contain either vinegar, citric acid, or acetic acid, all of which come from corn. So although the capers are very tasty on Caesar salad, we don't add them too often. I used the capers to replace the anchovies that are traditionally in Caesar salad. We like the hint of anchovy flavor in our Caesar salad, but I don't usually use it for logistical reasons. The only brand of anchovy paste that I've found in stores near me contains corn oil, and buying a whole tin of anchovies to use 1/2 teaspoon seems like a waste. (We're not anchovy lovers, so you won't ever hear of us consuming the rest of the tin of anchovies for lunch. And we really don't want to attract all of the cats in the neighborhood by offering them the rest.)

Caesar Salad
serves 2 to 3 adults, or 2 adults and 2 small children as a side salad

Ingredients:

  • 1 Romaine heart, rinsed and broken into bite-size pieces
  • 1 Tbsp. Parmesan cheese. Use either 4C Grated Imported Parmesan cheese, or a block of Parmesan that you grate using the smallest holes on a grater or zester. 4C brand is the only pre-grated Parmesan I've found that does not contain an anti-caking agent, which comes from corn.
  • 1 Tbsp. sour cream. Do not use low-fat. Use Daisy brand sour cream, or another brand that contains just cultured cream and nothing else.
  • 1 Tbsp. lemon juice. Use fresh lemon juice if possible, but bottled is okay.
  • 1/4 tsp. ground black pepper
  • 1/4 tsp. sea salt
  • 1/4 tsp. granulated white sugar
  • 1/4 tsp. minced garlic
  • 1/4 tsp. Dijon mustard
  • 1/4 cup canola oil
  • optional: 1/2 tsp. minced anchovies or 1 Tbsp. capers
Instructions:

Wash the Romaine lettuce and rip with your hands into bite-size pieces. Dry the lettuce in a salad spinner or with a couple of towels, and place in a large salad bowl.

In a small bowl grate the Parmesan, or sift the 4C grated Parmesan through a sieve to break it up into very small pieces. Stir together the cheese, sour cream, lemon juice, black pepper, salt, sugar, garlic, and Dijon mustard. Then slowly whisk in the canola oil. If using anchovies or capers, stir them into the dressing.

Right before serving the salad, toss the Romaine lettuce with the dressing.

Thursday, November 18, 2010

Chocolate Cupcakes with Chocolate Frosting


If last year's challenge for Sabrina's birthday was to make a cake without any wheat, corn, or dairy, then this year's challenge was to make a cake that also did not have any eggs. It took me several tries, but the girls didn't mind eating the trial versions, even if they didn't turn out quite right. I started with a Cook's Illustrated recipe for vegan chocolate cake and an award-winning recipe for vegan chocolate cupcakes. Unfortunately, these recipes didn't work as well using gluten-free flour. However, with a bit of tweaking, I came up with a version that turns out just right. For the frosting I started with a recipe for vegan chocolate frosting, which I adapted based on the ingredients I had on hand.

We had these cupcakes at Naomi's birthday party and at Sabrina's school party for her birthday. Needless to say, we've had a lot of cupcakes over the past month. I thought I might get tired of them, but not yet. Now I just need to think of a reason to make some more.


Chocolate Cupcakes with Chocolate Frosting
makes 12 cupcakes or 1 cake (in an 8"x8" pan or a 9" round cake pan)

Ingredients for the cupcakes:

  • 1 cup unsweetened vanilla rice milk. I use either Trader Joe's or Rice Dream brand.
  • 2 Tbsp. ground flax seed meal. I used Bob's Red Mill brand.
  • 1 1/2 cups Bob's Red Mill Gluten-free flour
  • 1/2 cup unsweetened cocoa. I use Ghirardelli's.
  • 1/2 tsp. sea salt
  • 1 tsp. baking soda
  • 3/4 cup granulated white sugar
  • 1 Tbsp. apple cider vinegar
  • 1 tsp. vanilla extract. Use Trader Joe's alcohol-free vanilla extract or another vanilla extract that does not have corn syrup and is preferably alcohol-free, since the alcohol could be derived from corn. Recently I have been using Rodelle Vanilla Flavor alcohol free all natural extract, which I found at Stop and Shop.
  • 6 Tbsp. canola oil
Ingredients for the frosting:
  • 1/2 cup dairy-free semi-sweet chocolate chips. I recommend Ghirardelli, Trader Joe's, or Enjoy Life brand.
  • 1/4 cup canola oil
  • 1 Tbsp. agave syrup or honey
  • 1 1/2 tsp. vanilla extract. Use Trader Joe's alcohol-free vanilla extract or another vanilla extract that does not have corn syrup and is preferably alcohol-free, since the alcohol could be derived from corn. Recently I have been using Rodelle Vanilla Flavor alcohol free all natural extract, which I found at Stop and Shop.
  • pinch of sea salt
Instructions for the cake:

Preheat the oven to 375 degrees. Grease an 8"x8" Pyrex pan, a 9"x9" cake pan, or 12 cups of a muffin tin with canola oil. If you would like to use cupcake liners, just grease the top of the muffin tin, so that any batter that rises above the liners does not stick to the muffin tin.

Heat 1/3 cup of the rice milk in the microwave until warm. Stir in the flax seed meal and set aside. In a large bowl sift the flour, cocoa powder, sea salt, and baking soda by stirring them with a large whisk. Make a hole in the middle of the dry ingredients and then set the bowl aside.

Warm the remaining 2/3 cup of rice milk. In a medium bowl stir together the granulated sugar and warmed rice milk so that the sugar starts to dissolve. Then whisk in the apple cider vinegar, vanilla extract, and canola oil. Finally stir in the flax seed meal and rice milk mixture.

Pour the liquid ingredients into the dry ingredients and stir just until the flour mixture has disappeared. Scoop the batter into the cake pan or muffin tin and bake for 15 minutes. If making cupcakes, let them cool for a couple of minutes before removing them from the muffin tin. Let the cake or cupcakes cool completely before spreading on the frosting.

Instructions for the frosting:

Place a small saucepan over low heat. Add the chocolate chips and canola oil to the pan. Stir frequently, until the chocolate chips have just melted. Remove the pan from the heat and stir in the agave syrup, vanilla extract, and sea salt.

Place the pan in the refrigerator for 20 minutes so that the liquid cools and thickens slightly. Then pour the liquid into the bowl of a standing mixer. Using the whisk attachment, beat the liquid on medium speed until it lightens in color and thickens to a spreadable consistency. Spread the frosting over the cake or cupcakes.

Wednesday, November 10, 2010

Chicken Cacciatore

I was too hungry tonight to take a picture of the chicken cacciatore before I dove in. Do you ever have nights like that? I meant to have dinner ready by 6 pm, but by the time I finished giving the girls a bath, it was almost 6 pm already, and I still had to make the salad and salad dressing. We sat down to eat by 6:15, but by then the girls and I were famished. There aren't very many times when I've seen Sabrina eat as quickly as she did tonight. It also helped that she really liked the chicken cacciatore. "This is really yummy!" she told me, and then she asked for more. Michael, who isn't the biggest fan of chicken thighs, also liked this dish a lot, so I think it now has to go into our regular dinner rotation.

Cacciatore means "hunter" or "hunter style." My particular rendition of this recipe didn't involve much in the way of hunting, except perhaps hunting down the crock pot in the very back of my cupboard. And it did take me a while to hunt down a jar of marinara sauce that didn't contain any soy or corn products. To my relief, I eventually did manage to track down and capture a jar that was just right.

Chicken Cacciatore
serves 3 adults, or 2 adults and 2 children

Ingredients:

  • 6 ounces of brown rice spaghetti noodles (if serving 2 adults and 2 children), or 8 ounces of rice spaghetti noodles (if serving 3 adults). I use Trader Joe's brand because it's inexpensive, but I'm sure there are other brands available.
  • 1 large yellow onion
  • 1 package containing 6 boneless skinless chicken thighs that are all-natural, kosher, or organic
  • 1 24-ounce jar of Bertolli Vineyard Premium Collections marinara with Burgundy wine (This is one of the only marinara sauces I have found that does not contain any corn syrup, soybean oil, or citric acid.)
  • 2 Tbsp. dry red wine. I used Burgundy.
Instructions:

A little more than 7 hours before you want to serve the dinner, begin the recipe. Peel the onion, cut it in half, and then slice it into half-moon shapes. Lay the onion half-moons onto the bottom of the crock pot so that they cover the bottom. Thoroughly rinse the chicken thighs and place them on top of the onions. Then pour the jar of marinara sauce over the top of the chicken thighs so that the sauce completely covers the chicken.

Cook the chicken in the crock pot for 6 to 7 hours on low. Or if you prefer to start out with frozen chicken thighs, cook them for 1 hour on high and then 6 hours on low.

30 minutes before the chicken will be done, put a large pot of salted water on the stove over high heat to bring to a boil. When the water comes to a boil, add the spaghetti noodles and cook for 10 to 12 minutes. When the noodles are done, pour them into a colander and thoroughly rinse them in hot water. This will prevent the noodles from sticking together and becoming one large spaghetti blob that is virtually impossible to break apart.

When the chicken is done, remove the chicken thighs from the crock pot and place them on a plate. Add 2 tablespoons of red wine to the marinara sauce and stir. Serve the chicken cacciatore by placing some spaghetti on each adult's plate, adding 2 chicken thighs, and ladling sauce over the noodles and chicken.

Sunday, November 7, 2010

Blueberry Muffins


I have been working on a recipe for egg-free blueberry muffins for a while. Since I always have a bag of wild blueberries in the freezer, I wanted an easy muffin recipe that I could use them in. I recommend using wild blueberries for this recipe because they are smaller, and therefore less likely to sink to the bottom of the muffin than regular-size blueberries.

It's still amazing to me that using flax seed meal, apple cider vinegar, and some extra baking soda, I can replicate the properties of egg in a muffin. These muffins hold together, rise, and stay moist, even without the egg. Hooray for egg-free muffins!

Blueberry Muffins
makes 6 muffins

Ingredients:

  • 1/2 cup rice milk. I used Trader Joe's vanilla rice drink or vanilla-flavored Rice Dream.
  • 1 Tbsp. ground flax seed meal. I used Bob's Red Mill brand.
  • 1 cup and 2 Tbsp. Bob's Red Mill Gluten-free flour
  • 3/4 tsp. baking soda
  • 1/4 tsp. sea salt
  • 1/2 tsp. ground cinnamon
  • 1/3 cup granulated white sugar
  • 3 Tbsp. canola oil
  • 1/2 Tbsp. (which is 1 1/2 tsp.) apple cider vinegar
  • 1/2 cup frozen wild blueberries
Instructions:

Preheat the oven to 375 degrees. Grease 6 cups of a muffin tin with canola oil. Heat the rice milk in the microwave for about 45 seconds. Add the flax seed meal to the rice milk, stir, and then set aside.

Into a medium bowl sift the flour using a sifter or a sieve. Add the baking soda, salt, and cinnamon, and stir to combine. In a small bowl mix together the sugar, canola oil, apple cider vinegar, and the rice milk and flax seed mixture. Then make a hole in the flour mixture and pour the liquid mixture into it. Stir just until you don't see any more dry flour.

Take the frozen blueberries and pour them into a small Ziploc bag. Add 1 teaspoon of gluten-free flour, seal the bag, and toss the berries around in the bag until they are coated in flour. Then gently stir the blueberries into the muffin batter. Quickly scoop the batter into the muffin tin and place the tin in the oven.

Bake the muffins for 15 minutes, or until a toothpick comes out of them mostly clean.

Monday, November 1, 2010

Oven Baked French Fries


Tonight for dinner I made some French fries that Michael liked so much that he said they didn't taste homemade. Hmm, I think that was a complement, right? I'll take it as one. ;) You can tell that the picture is of my plate because I'm the only one in the family who doesn't prefer to dip my French fries into ketchup. The girls have both taken after Michael in their appreciation of that red condiment. I think I might try to figure out how to make homemade honey mustard sauce so that I have something I like to dip my fries into as well.

If you like really crispy fries, then these aren't for you. (If your preference is for extra crispy, you might want to try out this Cook's Illustrated recipe.) But if you like French fries that are crispy on the outside and soft in the middle, then these are perfect. One pound of potatoes was plenty for the four of us (two adults and two small children) for dinner, but the French fries tasted so good that we all could have eaten a lot more. As the girls get older, I know that I'll need to make at least a pound and a half, otherwise Michael and I won't get as many of the fries as we would like.

I've used only regular white potatoes when I've made these French fries, but other recipes swear by Russets. I think that whatever kind of potato you have on hand would probably be fine. The key steps are to dry off the potatoes after you rinse them, to use the full amount of oil, and not to salt the fries until they have baked. When I didn't follow these steps, the fries stuck terribly to the baking sheet. The loss of some of the French fries was mourned by all, so now I am careful to preserve every last fry for our consumption.

A couple of other recipes with helpful tips for making great oven baked French fries are at the following links for Roasted Potato Wedges and Perfect Oven Fries.

Oven Baked French Fries
serves 2 adults and 2 small children

Ingredients:
(on a normal night)
  • 1 lb. potatoes
  • 2 Tbsp. canola oil
  • 1/8 tsp. onion powder
  • 1/8 tsp. paprika
  • 1/8 tsp. black pepper
  • dash of cayenne pepper
  • 1/2 tsp. kosher salt
Ingredients: (on a night when we're all really hungry)
  • 1 1/2 lb. potatoes
  • 3 Tbsp. canola oil
  • 1/4 tsp. onion powder
  • 1/4 tsp. paprika
  • 1/8 tsp. black pepper
  • dash of cayenne pepper
  • 3/4 tsp. kosher salt
Instructions:

Preheat the oven to 450 degrees. Place the baking sheet in the oven while it is preheating. Rinse the potatoes and then dry them thoroughly. Cut the potatoes into strips that are 1/4-inch wide and tall, and the length of the potato. Place the potato strips into a medium bowl and toss with the canola oil. Sprinkle the onion powder, paprika, black pepper, and cayenne pepper onto the potatoes and toss so that the potatoes are evenly coated with the spices.

When the oven is preheated, take the baking sheet out of the oven using oven mitts and spread the potatoes on the sheet in one layer. Return the baking sheet to the oven for 10 minutes. Then take the baking sheet out of the oven to toss the fries. Return the sheet to the oven for 10 more minutes. Toss the fries again; then return the sheet to the oven for 15 minutes. After the 15 minutes are up, transfer the French fries to a bowl. Sprinkle the salt onto the fries and toss the fries to distribute the salt evenly. Cover the bowl with aluminum foil until ready to serve.

Wednesday, October 27, 2010

Thai Red Chili Beef


This recipe is adapted from a Cook's Illustrated recipe. I like this recipe because you can marinate the meat for just 15 minutes if you're in a hurry, or you can marinate it for up to 2 hours if you have more time. I recommend using blade steak or flank steak because they are less fatty than some cuts and turn out really well when stir-fried.

I like using snow peas, green beans, or broccoli as the vegetable in this dish for some nice green color. If you use green beans or broccoli, I recommend blanching them so that they don't take long to cook when you stir-fry them right before serving. The snow peas don't need to be blanched because they are thin enough to cook quite quickly when stir-fried. If you don't have a green vegetable like broccoli, green beans, or snow peas to add to the stir fry, you can just sprinkle chopped green onions and cilantro on the top and then serve Asian-style coleslaw on the side.

Thai Red Chili Beef
serves 3 to 4 adults

Ingredients:

  • jasmine rice or another long-grain rice
  • 1 lb. blade steak or flank steak
  • a green vegetable: either 1 lb. green beans, 1/2 to 1 lb. snow peas, or 5 to 6 cups broccoli florets (about 2 brown crowns, depending on their size)
  • 1/2 Tbsp. gluten-free fish sauce. I use Thai Kitchen premium fish sauce.
  • 1/4 tsp. and 1/8 tsp. ground coriander
  • 1/8 tsp. ground white pepper
  • 1/2 tsp. light brown sugar
  • 2 Tbsp. gluten-free fish sauce
  • 2 Tbsp. rice vinegar
  • 2 Tbsp. water
  • 1 Tbsp. brown sugar
  • 1 Tbsp. gluten-free Asian red chili paste. I used Thai Kitchen brand.
  • 2 garlic cloves, minced (about 1 tsp.)
  • optional: chopped green onions and cilantro
Instructions:

If you want to serve the meal within 45 minutes of starting to prepare it, then start by putting the rice in the rice cooker and a large pot of water on the stove over high heat.

Between 15 minutes and 2 hours before cooking, slice the beef into thin strips. In a medium bowl combine the 1/2 Tbsp. fish sauce, ground coriander, ground white pepper, and 1/2 tsp. brown sugar. Add the beef to the bowl and stir so that all of the beef gets covered with the marinade. Place the bowl in the refrigerator if you want to marinate the beef longer than 15 minutes.

If you would like to have snow peas, rinse them and cut the ends off. If you would like to have blanched green beans or broccoli florets, put a large pot of water on the stove (if you haven't already) and bring the water to a boil over high heat. Rinse the green beans or broccoli, and cut the ends off of the green beans or cut the broccoli into bite-size pieces. When the water has come to a boil, add the vegetables and let them blanch in the water for exactly 2 minutes. Then transfer them to a colander and rinse them in cold water to stop the cooking process. You can put the blanched vegetables in a bowl in the refrigerator while the meat is marinating.

To make the sauce, stir together the 2 Tbsp. fish sauce, rice vinegar, water, brown sugar, red chili paste, and minced garlic.

About 5 to 10 minutes before you want to stir-fry the beef, take it out of the refrigerator. Place a large non-stick pan over medium-high heat and let the pan heat up for several minutes. Add 1 tablespoon of canola oil to the pan. Then add the beef to the pan and cook for 2 minutes, stirring constantly. Transfer the beef to a new bowl.

If using snow peas, add 1 more tablespoon of canola oil to the pan and then add the snow peas. Cook them for 1 to 2 minutes, until they have gotten hot and turned a darker green. Then add the sauce and the beef to the pan and let everything simmer for a couple of minutes, stirring occasionally, until the sauce had gotten hot and thickened slightly.

If using green beans or broccoli, after you have removed the beef from the pan, add the green beans or broccoli and the sauce. Let them cook, stirring occasionally, until the sauce and vegetables have gotten hot and the sauce has thickened slightly. Then return the beef to the pan and let everything simmer for a minute to reheat the beef.

Serve the Thai red chili beef and vegetables over rice with a garnish of chopped cilantro and green onions, if you have them available.

Wednesday, October 20, 2010

Mexican Chicken Stew


I have my friend Jenn and my mother-in-law Cathy to thank for this recipe. I first was introduced to it by Jenn when she and her husband invited Michael and me over to their house for dinner. We liked the stew so much that I wrote down the recipe. But somehow I didn't get around to trying it myself. That is, until Cathy gave me a surprise present of the very cookbook containing the recipe. Then I knew that I really had to make this Mexican chicken stew.

In order to avoid ingredients containing corn, I have modified the recipe. However, I think that the flavor is still true to the original. A tip from Jenn is that you can use frozen or semi-frozen chicken breasts; the chicken doesn't have to be defrosted before putting it into the crock pot.

Mexican Chicken Stew
serves 4 to 6 adults

Ingredients:

  • 1 jar of medium salsa. Use either Green Mountain Gringo salsa, Amy's salsa, or another brand that contains apple cider vinegar and does not contain any distilled white vinegar or citric acid.
  • 1 28-ounce can of Cento crushed tomatoes OR 1 26-ounce box of Pomi strained tomatoes OR another brand of tomato puree that does not contain citric acid, which usually comes from corn.
  • 2 15-ounce cans of black beans, undrained. Use cans that contain only black beans, water, and salt.
  • 1 Tbsp. chili powder. Or if all you have is hot Mexican chili powder, which happened to me once, then use just 1 tsp.
  • 1/2 tsp. ground coriander
  • 1/2 tsp. ground cumin
  • 1/4 tsp. ground black pepper
  • 1 tsp. dried oregano
  • 1 medium onion, chopped
  • 1 to 2 cloves of garlic, minced
  • 1.25 to 1.5 lb. boneless, skinless chicken breasts that are kosher, organic, or "all-natural" (about 3 to 4 half breasts depending on their size)
  • 1 Tbsp. of lime juice
  • fresh cilantro (optional)
  • sour cream (optional)
Instructions:

Pour into the crock pot the salsa, crushed tomatoes, black beans with the liquid from their cans, chili powder, coriander, cumin, black pepper, oregano, chopped onion, and garlic. Stir these together. Thoroughly rinse the chicken breasts and then place them in the crock pot so that they are covered by the liquid. Put the cover on the crock pot and let the stew cook for 8 hours on low; or for 1 hour on high and then 6 hours on low.

After that time, remove the chicken from the crock pot and shred it using two forks. Return the chicken to the crock pot and stir it into the rest of the stew. Stir in the lime juice and then serve. You can sprinkle some chopped cilantro on the stew as a garnish, and you can also top each serving with a spoonful of sour cream.