Thursday, December 30, 2010

Christmas in Portland


This year we celebrated Christmas in Portland, Oregon with Michael's side of the family. We did some last-minute gift shopping, got our nails painted, and visited the local pottery shop for the kids to make their own ornaments. In addition, we enjoyed the Christmas Eve and Sunday services at Athey Creek church.

Another big part of Christmas, of course, was the food. One Sterrett family tradition is to have a big pot of wassail on the stove. I'm not sure of the exact recipe, but this year's version was egg-free and alcohol-free so the kids could drink it, too. And on Christmas Eve we had the traditional dinner of turkey, dressing, mashed potatoes, sweet potatoes, and green beans.

Before and after Christmas we also enjoyed going out to eat. Thursday night we had a babysitter come so that the adults could eat out together. We went to the Macaroni Grill, which has excellent allergy information sheets so Michael knew exactly what he could order. To no surprise, he got steak and red wine, which he said were great -- he would happily go back for more. On our last night in Oregon we had eaten up most of the leftovers, so we decided to go out to eat again, this time with the kids. We went to Typhoon, a Thai restaurant chain in the Portland area with notations on its menus as to which foods are gluten-free. We especially liked the chicken satay, tom kha gai soup, Thai yellow curry, and phad Thai, and we'd love to go back the next time we're in the Portland area. Perhaps next time we'll also make it over to Bob's Red Mill to take a tour and have lunch.

Sunday, December 19, 2010

Lemon-Garlic Green Beans


It's been a while since Thanksgiving, but my excuse for not posting until just recently is that the past couple of weeks have been really busy. The busiest part was that I had to write the final 10-page paper for my literature class. I turned the paper in on Tuesday evening, but then I needed to catch up on all of the other things that I had been putting off, like doing the laundry and vacuuming.

Now that the laundry is done and the house is a bit cleaner, I'm finding the time to get back to posting some of the recipes that I've been wanting to share. One of these is for lemon-garlic green beans. We had these green beans at Thanksgiving, which we celebrated with my family. I really liked how the lemon and garlic flavor of the green beans contrasted with the flavors of the mashed potatoes, sweet potatoes, and stuffing. The recipe came from the December issue of Southern Living magazine, and here is the link to the original recipe. Below is my modified recipe. The primary change is that we like the beans with a bit more lemon flavor, so I add more lemon juice and zest. If you don't have fresh basil, the beans are just as good without it.

Lemon-Garlic Green Beans
serves 6 adults

Ingredients:
  • 1 1/2 lb. fresh haricots verts or green beans
  • 2 tsp. sea salt, divided
  • 1 tsp. minced garlic
  • 3 shallots OR 1 small yellow onion
  • 2 Tbsp. olive oil
  • 1/4 cup chopped fresh basil
  • 1/4 cup fresh lemon juice
  • zest of 1 lemon
  • 1/4 tsp. ground black pepper
Instructions:

Put a medium pot of water on the stove over high heat to bring to a boil. Add 1 teaspoon of the sea salt to the water. While the water is heating, trim the ends off of the haricots verts or green beans. Finely chop or thinly slice the shallots or onion, depending on your preference, and set aside. Chop the basil and set it aside as well.

When the water has come to a boil, add the green beans to the pot and let them cook 4 to 5 minutes, until they are tender-crisp. When they are done, remove the beans from the water. If you are serving the beans later in the day, immerse them in cold water to stop the cooking process. If you are serving the beans immediately, just drain them.

While the beans are cooking, place a medium pan over medium heat. Add the olive oil to the pan and let the oil heat up. When the oil is hot, add the onion to the pan and saute until the onion has softened. Add the garlic and stir constantly for 30 seconds. Remove the pan from the heat. Then add the chopped basil, lemon juice, lemon zest, pepper, and 1 teaspoon of sea salt. Stir all of the ingredients together. Add the green beans to the pan and toss them in the onion mixture to coat them thoroughly. Serve immediately; or if you are serving the beans later in the day, place them in a bowl in the refrigerator and reheat them later in the medium pan on the stove.

Saturday, December 18, 2010

Lemon Roast Chicken with Vegetables

I used to make a whole roast chicken with vegetables. It was a great one-dish meal . . . when it turned out. The problem was that if the chicken was a little too big or a little too cold when I put it into the oven, then it took longer for the chicken to cook than for the vegetables. Since we didn't want to eat under-cooked chicken, we sometimes ended up with over-cooked vegetables. The other problem was that as Michael has become more sensitive to corn in the food he eats, he has begun to react to whole roast chicken. At first I thought that buying an organic or kosher chicken would help, but it doesn't always. So, since I really like roast chicken and vegetables, and especially as a one-dish meal, I needed to come up with an alternative.

I decided to try buying a whole chicken that was already cut into pieces. If I buy kosher or organic chicken and wash the chicken pieces really well in cold water, Michael doesn't react. I think the combination of the kosher/organic chicken, the washing, and the high roasting temperature makes the cooked chicken corn-free. Hooray!

Lemon Roast Chicken with Vegetables
serves 4 adults

Ingredients:

  • 1 whole kosher or organic chicken, bought already cut into 8 pieces that still have the bones in and skin on
  • 1 1/2 lb. potatoes. Any kind of potato works except for Russet, which fall apart.
  • 1 lb. baby carrots
  • 1 medium onion
  • 3 Tbsp. olive oil
  • 1 tsp. kosher salt
  • 1/2 tsp. ground black pepper
  • 2 tsp. minced garlic
  • 1/2 tsp. dried thyme
  • 2 lemons
Instructions:

Preheat oven to 450 degrees. Immediately take the carrots out of the refrigerator so that they can come to room temperature. Pour the carrots into a large bowl.

Lightly grease a 9"x13" Pyrex pan with olive oil. Thoroughly rinse the chicken pieces in cold water. Dry them with paper towels and then place them in the pan in a single layer. Sprinkle the chicken with kosher salt and pepper.

Rinse and dry the potatoes, and then cut them into 1 1/2 to 2-inch cubes. Add the potatoes to the bowl with the carrots. Chop the onion and add it to the bowl. Drizzle the olive oil over the vegetables and toss to coat. Then sprinkle the 1 tsp. kosher salt, 1/2 tsp. pepper, garlic, and thyme over the vegetables and toss the vegetables again so that they are evenly covered with the herbs and spices.

Place the vegetables on top of the chicken pieces so that they cover the chicken. Put the pan in the oven and roast for 30 minutes. Remove the pan from the oven and take the chicken pieces out of the pan. Toss the vegetables in the juices and then spread the vegetables so that they lay evenly in the pan. Place the chicken pieces on top of the vegetables. Return the pan to the oven and roast for 20 more minutes.

Take the pan out of the oven and check to make sure that the chicken is cooked fully. Remove the chicken from the pan and place on a serving plate. Drizzle the juice of 1/2 lemon over the top of the chicken pieces. Drizzle the juice from the other 1 1/2 lemons onto the vegetables and then toss the vegetables in the roasting pan. Transfer the vegetables to a serving bowl.

Since I never remember who likes white meat versus dark meat, I let people serve themselves from the plate of chicken pieces and the bowl of vegetables. If you have more than two people who like white meat, either cut the breasts in half or draw straws to decide who gets them.

Friday, December 3, 2010

Caesar Salad


Whenever we go out to eat at a fancy restaurant, Michael orders the Caesar salad. His absolute favorite was one that he ate at a restaurant in Vancouver, Canada called Seasons in the Park. Ahh, the memories of delicious meals eaten while we lived in Vancouver. However, we no longer live in Vancouver, and even when we did live there, we couldn't eat out at an upscale restaurant every night. So back in our Vancouver pre-children days, I got on a salad dressing kick and experimented with home-made Caesar salad dressing. I came up with a pretty good dressing that Michael and I both liked. Then we moved back to the US and had kids. For a couple of years I didn't have time to make salad dressings, and I completely forgot about the homemade Caesar dressing that we had liked.

This summer I had a craving for Caesar salad, so I went to our local supermarkets to try to find a bottle of dressing that did not have any corn syrup or soybean oil, and ideally not much distilled vinegar either, since that comes from corn. I was so excited when I found one brand that fit those criteria. Unfortunately, when we tried it out on our Romaine lettuce, it tasted terrible. Fortunately, I remembered where I had put my recipe for homemade Caesar salad dressing. The recipe needed some tweaking to make it egg-free, but after several tries I have come up with the following recipe, which gets Michael's stamp of approval.

The picture above shows Caesar salad with capers. Unfortunately, all store-bought jars of capers that I have come across so far seem to contain either vinegar, citric acid, or acetic acid, all of which come from corn. So although the capers are very tasty on Caesar salad, we don't add them too often. I used the capers to replace the anchovies that are traditionally in Caesar salad. We like the hint of anchovy flavor in our Caesar salad, but I don't usually use it for logistical reasons. The only brand of anchovy paste that I've found in stores near me contains corn oil, and buying a whole tin of anchovies to use 1/2 teaspoon seems like a waste. (We're not anchovy lovers, so you won't ever hear of us consuming the rest of the tin of anchovies for lunch. And we really don't want to attract all of the cats in the neighborhood by offering them the rest.)

Caesar Salad
serves 2 to 3 adults, or 2 adults and 2 small children as a side salad

Ingredients:

  • 1 Romaine heart, rinsed and broken into bite-size pieces
  • 1 Tbsp. Parmesan cheese. Use either 4C Grated Imported Parmesan cheese, or a block of Parmesan that you grate using the smallest holes on a grater or zester. 4C brand is the only pre-grated Parmesan I've found that does not contain an anti-caking agent, which comes from corn.
  • 1 Tbsp. sour cream. Do not use low-fat. Use Daisy brand sour cream, or another brand that contains just cultured cream and nothing else.
  • 1 Tbsp. lemon juice. Use fresh lemon juice if possible, but bottled is okay.
  • 1/4 tsp. ground black pepper
  • 1/4 tsp. sea salt
  • 1/4 tsp. granulated white sugar
  • 1/4 tsp. minced garlic
  • 1/4 tsp. Dijon mustard
  • 1/4 cup canola oil
  • optional: 1/2 tsp. minced anchovies or 1 Tbsp. capers
Instructions:

Wash the Romaine lettuce and rip with your hands into bite-size pieces. Dry the lettuce in a salad spinner or with a couple of towels, and place in a large salad bowl.

In a small bowl grate the Parmesan, or sift the 4C grated Parmesan through a sieve to break it up into very small pieces. Stir together the cheese, sour cream, lemon juice, black pepper, salt, sugar, garlic, and Dijon mustard. Then slowly whisk in the canola oil. If using anchovies or capers, stir them into the dressing.

Right before serving the salad, toss the Romaine lettuce with the dressing.

Thursday, November 18, 2010

Chocolate Cupcakes with Chocolate Frosting


If last year's challenge for Sabrina's birthday was to make a cake without any wheat, corn, or dairy, then this year's challenge was to make a cake that also did not have any eggs. It took me several tries, but the girls didn't mind eating the trial versions, even if they didn't turn out quite right. I started with a Cook's Illustrated recipe for vegan chocolate cake and an award-winning recipe for vegan chocolate cupcakes. Unfortunately, these recipes didn't work as well using gluten-free flour. However, with a bit of tweaking, I came up with a version that turns out just right. For the frosting I started with a recipe for vegan chocolate frosting, which I adapted based on the ingredients I had on hand.

We had these cupcakes at Naomi's birthday party and at Sabrina's school party for her birthday. Needless to say, we've had a lot of cupcakes over the past month. I thought I might get tired of them, but not yet. Now I just need to think of a reason to make some more.


Chocolate Cupcakes with Chocolate Frosting
makes 12 cupcakes or 1 cake (in an 8"x8" pan or a 9" round cake pan)

Ingredients for the cupcakes:

  • 1 cup unsweetened vanilla rice milk. I use either Trader Joe's or Rice Dream brand.
  • 2 Tbsp. ground flax seed meal. I used Bob's Red Mill brand.
  • 1 1/2 cups Bob's Red Mill Gluten-free flour
  • 1/2 cup unsweetened cocoa. I use Ghirardelli's.
  • 1/2 tsp. sea salt
  • 1 tsp. baking soda
  • 3/4 cup granulated white sugar
  • 1 Tbsp. apple cider vinegar
  • 1 tsp. vanilla extract. Use Trader Joe's alcohol-free vanilla extract or another vanilla extract that does not have corn syrup and is preferably alcohol-free, since the alcohol could be derived from corn. Recently I have been using Rodelle Vanilla Flavor alcohol free all natural extract, which I found at Stop and Shop.
  • 6 Tbsp. canola oil
Ingredients for the frosting:
  • 1/2 cup dairy-free semi-sweet chocolate chips. I recommend Ghirardelli, Trader Joe's, or Enjoy Life brand.
  • 1/4 cup canola oil
  • 1 Tbsp. agave syrup or honey
  • 1 1/2 tsp. vanilla extract. Use Trader Joe's alcohol-free vanilla extract or another vanilla extract that does not have corn syrup and is preferably alcohol-free, since the alcohol could be derived from corn. Recently I have been using Rodelle Vanilla Flavor alcohol free all natural extract, which I found at Stop and Shop.
  • pinch of sea salt
Instructions for the cake:

Preheat the oven to 375 degrees. Grease an 8"x8" Pyrex pan, a 9"x9" cake pan, or 12 cups of a muffin tin with canola oil. If you would like to use cupcake liners, just grease the top of the muffin tin, so that any batter that rises above the liners does not stick to the muffin tin.

Heat 1/3 cup of the rice milk in the microwave until warm. Stir in the flax seed meal and set aside. In a large bowl sift the flour, cocoa powder, sea salt, and baking soda by stirring them with a large whisk. Make a hole in the middle of the dry ingredients and then set the bowl aside.

Warm the remaining 2/3 cup of rice milk. In a medium bowl stir together the granulated sugar and warmed rice milk so that the sugar starts to dissolve. Then whisk in the apple cider vinegar, vanilla extract, and canola oil. Finally stir in the flax seed meal and rice milk mixture.

Pour the liquid ingredients into the dry ingredients and stir just until the flour mixture has disappeared. Scoop the batter into the cake pan or muffin tin and bake for 15 minutes. If making cupcakes, let them cool for a couple of minutes before removing them from the muffin tin. Let the cake or cupcakes cool completely before spreading on the frosting.

Instructions for the frosting:

Place a small saucepan over low heat. Add the chocolate chips and canola oil to the pan. Stir frequently, until the chocolate chips have just melted. Remove the pan from the heat and stir in the agave syrup, vanilla extract, and sea salt.

Place the pan in the refrigerator for 20 minutes so that the liquid cools and thickens slightly. Then pour the liquid into the bowl of a standing mixer. Using the whisk attachment, beat the liquid on medium speed until it lightens in color and thickens to a spreadable consistency. Spread the frosting over the cake or cupcakes.

Wednesday, November 10, 2010

Chicken Cacciatore

I was too hungry tonight to take a picture of the chicken cacciatore before I dove in. Do you ever have nights like that? I meant to have dinner ready by 6 pm, but by the time I finished giving the girls a bath, it was almost 6 pm already, and I still had to make the salad and salad dressing. We sat down to eat by 6:15, but by then the girls and I were famished. There aren't very many times when I've seen Sabrina eat as quickly as she did tonight. It also helped that she really liked the chicken cacciatore. "This is really yummy!" she told me, and then she asked for more. Michael, who isn't the biggest fan of chicken thighs, also liked this dish a lot, so I think it now has to go into our regular dinner rotation.

Cacciatore means "hunter" or "hunter style." My particular rendition of this recipe didn't involve much in the way of hunting, except perhaps hunting down the crock pot in the very back of my cupboard. And it did take me a while to hunt down a jar of marinara sauce that didn't contain any soy or corn products. To my relief, I eventually did manage to track down and capture a jar that was just right.

Chicken Cacciatore
serves 3 adults, or 2 adults and 2 children

Ingredients:

  • 6 ounces of brown rice spaghetti noodles (if serving 2 adults and 2 children), or 8 ounces of rice spaghetti noodles (if serving 3 adults). I use Trader Joe's brand because it's inexpensive, but I'm sure there are other brands available.
  • 1 large yellow onion
  • 1 package containing 6 boneless skinless chicken thighs that are all-natural, kosher, or organic
  • 1 24-ounce jar of Bertolli Vineyard Premium Collections marinara with Burgundy wine (This is one of the only marinara sauces I have found that does not contain any corn syrup, soybean oil, or citric acid.)
  • 2 Tbsp. dry red wine. I used Burgundy.
Instructions:

A little more than 7 hours before you want to serve the dinner, begin the recipe. Peel the onion, cut it in half, and then slice it into half-moon shapes. Lay the onion half-moons onto the bottom of the crock pot so that they cover the bottom. Thoroughly rinse the chicken thighs and place them on top of the onions. Then pour the jar of marinara sauce over the top of the chicken thighs so that the sauce completely covers the chicken.

Cook the chicken in the crock pot for 6 to 7 hours on low. Or if you prefer to start out with frozen chicken thighs, cook them for 1 hour on high and then 6 hours on low.

30 minutes before the chicken will be done, put a large pot of salted water on the stove over high heat to bring to a boil. When the water comes to a boil, add the spaghetti noodles and cook for 10 to 12 minutes. When the noodles are done, pour them into a colander and thoroughly rinse them in hot water. This will prevent the noodles from sticking together and becoming one large spaghetti blob that is virtually impossible to break apart.

When the chicken is done, remove the chicken thighs from the crock pot and place them on a plate. Add 2 tablespoons of red wine to the marinara sauce and stir. Serve the chicken cacciatore by placing some spaghetti on each adult's plate, adding 2 chicken thighs, and ladling sauce over the noodles and chicken.

Sunday, November 7, 2010

Blueberry Muffins


I have been working on a recipe for egg-free blueberry muffins for a while. Since I always have a bag of wild blueberries in the freezer, I wanted an easy muffin recipe that I could use them in. I recommend using wild blueberries for this recipe because they are smaller, and therefore less likely to sink to the bottom of the muffin than regular-size blueberries.

It's still amazing to me that using flax seed meal, apple cider vinegar, and some extra baking soda, I can replicate the properties of egg in a muffin. These muffins hold together, rise, and stay moist, even without the egg. Hooray for egg-free muffins!

Blueberry Muffins
makes 6 muffins

Ingredients:

  • 1/2 cup rice milk. I used Trader Joe's vanilla rice drink or vanilla-flavored Rice Dream.
  • 1 Tbsp. ground flax seed meal. I used Bob's Red Mill brand.
  • 1 cup and 2 Tbsp. Bob's Red Mill Gluten-free flour
  • 3/4 tsp. baking soda
  • 1/4 tsp. sea salt
  • 1/2 tsp. ground cinnamon
  • 1/3 cup granulated white sugar
  • 3 Tbsp. canola oil
  • 1/2 Tbsp. (which is 1 1/2 tsp.) apple cider vinegar
  • 1/2 cup frozen wild blueberries
Instructions:

Preheat the oven to 375 degrees. Grease 6 cups of a muffin tin with canola oil. Heat the rice milk in the microwave for about 45 seconds. Add the flax seed meal to the rice milk, stir, and then set aside.

Into a medium bowl sift the flour using a sifter or a sieve. Add the baking soda, salt, and cinnamon, and stir to combine. In a small bowl mix together the sugar, canola oil, apple cider vinegar, and the rice milk and flax seed mixture. Then make a hole in the flour mixture and pour the liquid mixture into it. Stir just until you don't see any more dry flour.

Take the frozen blueberries and pour them into a small Ziploc bag. Add 1 teaspoon of gluten-free flour, seal the bag, and toss the berries around in the bag until they are coated in flour. Then gently stir the blueberries into the muffin batter. Quickly scoop the batter into the muffin tin and place the tin in the oven.

Bake the muffins for 15 minutes, or until a toothpick comes out of them mostly clean.

Monday, November 1, 2010

Oven Baked French Fries


Tonight for dinner I made some French fries that Michael liked so much that he said they didn't taste homemade. Hmm, I think that was a complement, right? I'll take it as one. ;) You can tell that the picture is of my plate because I'm the only one in the family who doesn't prefer to dip my French fries into ketchup. The girls have both taken after Michael in their appreciation of that red condiment. I think I might try to figure out how to make homemade honey mustard sauce so that I have something I like to dip my fries into as well.

If you like really crispy fries, then these aren't for you. (If your preference is for extra crispy, you might want to try out this Cook's Illustrated recipe.) But if you like French fries that are crispy on the outside and soft in the middle, then these are perfect. One pound of potatoes was plenty for the four of us (two adults and two small children) for dinner, but the French fries tasted so good that we all could have eaten a lot more. As the girls get older, I know that I'll need to make at least a pound and a half, otherwise Michael and I won't get as many of the fries as we would like.

I've used only regular white potatoes when I've made these French fries, but other recipes swear by Russets. I think that whatever kind of potato you have on hand would probably be fine. The key steps are to dry off the potatoes after you rinse them, to use the full amount of oil, and not to salt the fries until they have baked. When I didn't follow these steps, the fries stuck terribly to the baking sheet. The loss of some of the French fries was mourned by all, so now I am careful to preserve every last fry for our consumption.

A couple of other recipes with helpful tips for making great oven baked French fries are at the following links for Roasted Potato Wedges and Perfect Oven Fries.

Oven Baked French Fries
serves 2 adults and 2 small children

Ingredients:
(on a normal night)
  • 1 lb. potatoes
  • 2 Tbsp. canola oil
  • 1/8 tsp. onion powder
  • 1/8 tsp. paprika
  • 1/8 tsp. black pepper
  • dash of cayenne pepper
  • 1/2 tsp. kosher salt
Ingredients: (on a night when we're all really hungry)
  • 1 1/2 lb. potatoes
  • 3 Tbsp. canola oil
  • 1/4 tsp. onion powder
  • 1/4 tsp. paprika
  • 1/8 tsp. black pepper
  • dash of cayenne pepper
  • 3/4 tsp. kosher salt
Instructions:

Preheat the oven to 450 degrees. Place the baking sheet in the oven while it is preheating. Rinse the potatoes and then dry them thoroughly. Cut the potatoes into strips that are 1/4-inch wide and tall, and the length of the potato. Place the potato strips into a medium bowl and toss with the canola oil. Sprinkle the onion powder, paprika, black pepper, and cayenne pepper onto the potatoes and toss so that the potatoes are evenly coated with the spices.

When the oven is preheated, take the baking sheet out of the oven using oven mitts and spread the potatoes on the sheet in one layer. Return the baking sheet to the oven for 10 minutes. Then take the baking sheet out of the oven to toss the fries. Return the sheet to the oven for 10 more minutes. Toss the fries again; then return the sheet to the oven for 15 minutes. After the 15 minutes are up, transfer the French fries to a bowl. Sprinkle the salt onto the fries and toss the fries to distribute the salt evenly. Cover the bowl with aluminum foil until ready to serve.

Wednesday, October 27, 2010

Thai Red Chili Beef


This recipe is adapted from a Cook's Illustrated recipe. I like this recipe because you can marinate the meat for just 15 minutes if you're in a hurry, or you can marinate it for up to 2 hours if you have more time. I recommend using blade steak or flank steak because they are less fatty than some cuts and turn out really well when stir-fried.

I like using snow peas, green beans, or broccoli as the vegetable in this dish for some nice green color. If you use green beans or broccoli, I recommend blanching them so that they don't take long to cook when you stir-fry them right before serving. The snow peas don't need to be blanched because they are thin enough to cook quite quickly when stir-fried. If you don't have a green vegetable like broccoli, green beans, or snow peas to add to the stir fry, you can just sprinkle chopped green onions and cilantro on the top and then serve Asian-style coleslaw on the side.

Thai Red Chili Beef
serves 3 to 4 adults

Ingredients:

  • jasmine rice or another long-grain rice
  • 1 lb. blade steak or flank steak
  • a green vegetable: either 1 lb. green beans, 1/2 to 1 lb. snow peas, or 5 to 6 cups broccoli florets (about 2 brown crowns, depending on their size)
  • 1/2 Tbsp. gluten-free fish sauce. I use Thai Kitchen premium fish sauce.
  • 1/4 tsp. and 1/8 tsp. ground coriander
  • 1/8 tsp. ground white pepper
  • 1/2 tsp. light brown sugar
  • 2 Tbsp. gluten-free fish sauce
  • 2 Tbsp. rice vinegar
  • 2 Tbsp. water
  • 1 Tbsp. brown sugar
  • 1 Tbsp. gluten-free Asian red chili paste. I used Thai Kitchen brand.
  • 2 garlic cloves, minced (about 1 tsp.)
  • optional: chopped green onions and cilantro
Instructions:

If you want to serve the meal within 45 minutes of starting to prepare it, then start by putting the rice in the rice cooker and a large pot of water on the stove over high heat.

Between 15 minutes and 2 hours before cooking, slice the beef into thin strips. In a medium bowl combine the 1/2 Tbsp. fish sauce, ground coriander, ground white pepper, and 1/2 tsp. brown sugar. Add the beef to the bowl and stir so that all of the beef gets covered with the marinade. Place the bowl in the refrigerator if you want to marinate the beef longer than 15 minutes.

If you would like to have snow peas, rinse them and cut the ends off. If you would like to have blanched green beans or broccoli florets, put a large pot of water on the stove (if you haven't already) and bring the water to a boil over high heat. Rinse the green beans or broccoli, and cut the ends off of the green beans or cut the broccoli into bite-size pieces. When the water has come to a boil, add the vegetables and let them blanch in the water for exactly 2 minutes. Then transfer them to a colander and rinse them in cold water to stop the cooking process. You can put the blanched vegetables in a bowl in the refrigerator while the meat is marinating.

To make the sauce, stir together the 2 Tbsp. fish sauce, rice vinegar, water, brown sugar, red chili paste, and minced garlic.

About 5 to 10 minutes before you want to stir-fry the beef, take it out of the refrigerator. Place a large non-stick pan over medium-high heat and let the pan heat up for several minutes. Add 1 tablespoon of canola oil to the pan. Then add the beef to the pan and cook for 2 minutes, stirring constantly. Transfer the beef to a new bowl.

If using snow peas, add 1 more tablespoon of canola oil to the pan and then add the snow peas. Cook them for 1 to 2 minutes, until they have gotten hot and turned a darker green. Then add the sauce and the beef to the pan and let everything simmer for a couple of minutes, stirring occasionally, until the sauce had gotten hot and thickened slightly.

If using green beans or broccoli, after you have removed the beef from the pan, add the green beans or broccoli and the sauce. Let them cook, stirring occasionally, until the sauce and vegetables have gotten hot and the sauce has thickened slightly. Then return the beef to the pan and let everything simmer for a minute to reheat the beef.

Serve the Thai red chili beef and vegetables over rice with a garnish of chopped cilantro and green onions, if you have them available.

Wednesday, October 20, 2010

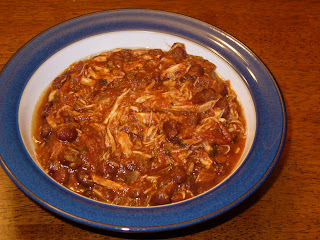
Mexican Chicken Stew


I have my friend Jenn and my mother-in-law Cathy to thank for this recipe. I first was introduced to it by Jenn when she and her husband invited Michael and me over to their house for dinner. We liked the stew so much that I wrote down the recipe. But somehow I didn't get around to trying it myself. That is, until Cathy gave me a surprise present of the very cookbook containing the recipe. Then I knew that I really had to make this Mexican chicken stew.

In order to avoid ingredients containing corn, I have modified the recipe. However, I think that the flavor is still true to the original. A tip from Jenn is that you can use frozen or semi-frozen chicken breasts; the chicken doesn't have to be defrosted before putting it into the crock pot.

Mexican Chicken Stew
serves 4 to 6 adults

Ingredients:

  • 1 jar of medium salsa. Use either Green Mountain Gringo salsa, Amy's salsa, or another brand that contains apple cider vinegar and does not contain any distilled white vinegar or citric acid.
  • 1 28-ounce can of Cento crushed tomatoes OR 1 26-ounce box of Pomi strained tomatoes OR another brand of tomato puree that does not contain citric acid, which usually comes from corn.
  • 2 15-ounce cans of black beans, undrained. Use cans that contain only black beans, water, and salt.
  • 1 Tbsp. chili powder. Or if all you have is hot Mexican chili powder, which happened to me once, then use just 1 tsp.
  • 1/2 tsp. ground coriander
  • 1/2 tsp. ground cumin
  • 1/4 tsp. ground black pepper
  • 1 tsp. dried oregano
  • 1 medium onion, chopped
  • 1 to 2 cloves of garlic, minced
  • 1.25 to 1.5 lb. boneless, skinless chicken breasts that are kosher, organic, or "all-natural" (about 3 to 4 half breasts depending on their size)
  • 1 Tbsp. of lime juice
  • fresh cilantro (optional)
  • sour cream (optional)
Instructions:

Pour into the crock pot the salsa, crushed tomatoes, black beans with the liquid from their cans, chili powder, coriander, cumin, black pepper, oregano, chopped onion, and garlic. Stir these together. Thoroughly rinse the chicken breasts and then place them in the crock pot so that they are covered by the liquid. Put the cover on the crock pot and let the stew cook for 8 hours on low; or for 1 hour on high and then 6 hours on low.

After that time, remove the chicken from the crock pot and shred it using two forks. Return the chicken to the crock pot and stir it into the rest of the stew. Stir in the lime juice and then serve. You can sprinkle some chopped cilantro on the stew as a garnish, and you can also top each serving with a spoonful of sour cream.

Thursday, October 14, 2010

Lemon Poppy Seed Muffins


Michael requested lemon poppy seed muffins, and I thought that I would try to figure out how to make them egg-free so Sabrina could eat them as well. It took a few tries, but I'm pretty pleased with this recipe now. I've been working on egg-free muffins since this summer, and I'm finally getting the hang of it. The secret ingredient is vinegar, or another acid like lemon juice. The combination of the vinegar and the baking soda causes the muffins to rise. In addition, the use of ground flax seed meal soaked in hot water helps the muffins to hold together and not crumble.

The other lesson I've been learning about gluten-free baking is the importance of sifting the flour. Before I started sifting the flour, I would end up with pockets of dry flour in my muffins. Finally it dawned on me that the flour pockets came from the lumps of flour in my batter. Since I didn't own a flour sifter, I improvised with a fine-mesh sieve, which I gently shook back and forth to help the flour go through the holes. Voila! No more lumps or pockets of flour! I just read on another blog that you also can use a whisk to mix the flour and other dry ingredients together until all the lumps are gone.

Lemon Poppy Seed Muffins
makes 6 muffins

Ingredients:

  • 1/2 Tbsp. Bob's Red Mill ground flax seed meal (and 2 Tbsp. hot water)
  • 1 cup + 2 Tbsp. Bob's Red Mill gluten-free flour, sifted
  • 3/4 tsp. baking soda
  • 1/4 tsp. sea salt
  • 2 to 3 tsp. poppy seeds
  • 3 Tbsp. olive oil
  • 1/3 cup granulated white sugar
  • 1/2 cup rice milk, warmed
  • 1/2 tsp. vanilla extract. Use Trader Joe's alcohol-free vanilla extract or another vanilla extract that does not have corn syrup and is preferably alcohol-free, since the alcohol could be derived from corn. Recently I have been using Rodelle Vanilla Flavor alcohol free all natural extract, which I found at Stop and Shop.
  • 1 Tbsp. fresh lemon juice
  • zest from 1 lemon
Instructions:

Preheat oven to 375 degrees. Grease 6 cups in a muffin tin with canola oil. In a small bowl or mug heat 2 tablespoons of water and then stir in the flax seed meal.

In a medium bowl whisk together the flour, baking soda, salt, and poppy seeds. In a small bowl combine the canola oil, sugar, warmed rice milk, vanilla extract, lemon juice, lemon zest, and the flax seed meal mixture. Stir the liquids until the sugar dissolves. Make a hole in the middle of the flour mixture and pour the liquid mixture into it. Stir with a spoon just until you don't see anymore flour.

Spoon the batter into the muffin tin cups. Bake for 15 minutes, until a toothpick inserted into one of the muffins comes out mostly clean. Use a knife or small spatula to loosen the muffins from the tin. Then transfer the muffins to a cooling rack.

Tuesday, October 5, 2010

Chopped Iceberg Lettuce Salad


Michael really likes iceberg lettuce. If it were up to him, whenever we eat a lettuce-based salad, it would consist of iceberg lettuce. I, on the other hand, like lots of dark green lettuce and other greens that Michael refers to as "weeds." Since I make Michael eat dark leafy salads most of the time, I thought I should try to find an iceberg lettuce salad that I would be willing to eat (i.e. that wouldn't taste like crunchy water). This recipe for chopped salad showed me how. Think of it as being like an antipasto salad but without the salami. The dressing and toppings give the salad a lot of flavor, and the chopped iceberg lettuce gives it a nice crunch. I also like the fact that you can be creative with the toppings. Instead of roasted marinated peppers, you could use marinated sun-dried tomatoes or fresh cherry tomatoes. You could use chopped green olives or pickles. Another similar recipe calls for using marinated artichoke hearts, which sounds great, too. You could even add chickpeas, as another recipe suggests. Be creative and enjoy!

Chopped Iceberg Lettuce Salad
serves 3 to 4 adults

Ingredients:
  • 1/4 cup finely chopped onion
  • 2 Tbsp. water
  • 1/4 cup red wine vinegar
  • 1 tsp. kosher salt
  • 1/2 tsp. ground black pepper
  • 1/2 tsp. dried marjoram leaves (or dried rosemary, if you prefer)
  • 1/4 cup olive oil
  • 1/2 large head of iceberg lettuce
  • 1/2 cup of roasted marinated peppers OR 1/2 cup marinated sun-dried tomatoes
  • 1 small can of Lindsay's Naturals sliced black olives
  • 1/4 cup sliced green olives or sliced sour pickles
  • 1/2 cup haricots verts (if you can find them, but these are not essential to the salad)
Instructions:

Finely chop the onion. In a small bowl combine the chopped onion, water, red wine vinegar, salt, pepper, and marjoram leaves. Whisk in the olive oil. Let the dressing sit at room temperature for 5 to 10 minutes.

Cut the half a head of iceberg lettuce into 1/2-inch to 1-inch pieces, so that you end up with 3 to 4 cups of lettuce. Cut the roasted marinated peppers or sun-dried tomatoes and the pickles into 1/4-inch to 1/2-inch pieces. If using, cut the haricots verts into 1-inch pieces.

In a large bowl combine the lettuce with the cut-up toppings and toss with some of the dressing. Serve the rest of the dressing on the side to let people add to their preference.

Wednesday, September 29, 2010

Hot German Potato Salad


I've come up with a mayonnaise-free version of another favorite, this time a hot German potato salad. All I had to tell Michael was that it had bacon in it, and he was excited. I really like the combination of salty, sweet, and sour flavors in the dressing, along with the crunchy texture of the bacon. When my parents came up to visit this past weekend, I decided to make them a German-themed meal and served them this potato salad with pork sausages and cooked red cabbage.

Hot German Potato Salad
serves 4 adults

Ingredients:

  • 2 lb. of Yukon Gold or other thin-skinned white potatoes
  • 1 Tbsp. apple cider vinegar
  • 1 tsp. sea salt
  • 2 cups water
  • 4 slices of bacon. To find a corn-free bacon, look for one that has just these ingredients: pork, salt, sugar, celery powder, and spices. I recommend a bacon I find at Trader Joe's called Classic Sliced Dry Rubbed All Natural Uncured Bacon. Another corn-free bacon is Hormel Natural Choice 100% Natural Original Uncured Bacon. Be sure that the bacon you use does not have any dextrose, sodium erythorbate, sodium lactate, or lactic acid starter culture.
  • 1/4 cup chopped yellow onion
  • 1/2 cup of potato liquid
  • canola oil (1 to 3 Tbsp. depending on the amount of bacon drippings you have.)
  • 1 tsp. granulated white sugar
  • 1/2 tsp. sea salt
  • 1/4 tsp. black pepper
  • 2 Tbsp. apple cider vinegar
  • 1/8 tsp. celery seeds or 1/2 tsp. mustard seeds, depending on what you have
  • dried or fresh parsley (optional)
Instructions:

Place a large 12-inch frying pan over medium heat. Add 1 tablespoon of apple cider vinegar, 1 teaspoon of sea salt, and 2 cups of water to the pan and stir. While the liquid is heating, peel and rinse the potatoes. Cut the potatoes into 1/4-inch wide slices. Place the slices of potatoes in layers into the pan of heating liquid. (The top layer of potatoes will not be fully covered by the water.) Increase the heat and let the liquid come to a simmer. Then turn down the heat to medium-low, cover the pan, and let the potatoes simmer for 15 to 20 minutes, until they are fork-tender.

While the potatoes are cooking, cut the bacon into thin 1/4-inch wide strips and cook over medium heat until the bacon is browned and crunchy. Remove the bacon from the pan and place on a paper towel-lined plate, keeping the drippings in the pan. To make the dressing for the salad, measure the drippings and pour up to 4 tablespoons of bacon drippings into a small bowl. I usually have about 2 tablespoonfuls of drippings; therefore, I add 2 tablespoons of canola oil to bring the total amount of drippings and oil up to 4 tablespoons. Into the drippings and oil whisk the granulated white sugar, 1/2 teaspoon of sea salt, black pepper, 2 tablespoons of apple cider vinegar, and either celery seeds or mustard seeds. Finely chop about half of a small yellow onion so that you have 1/4 cup of chopped onion for the salad.

Drain the potatoes in a large colander with a large bowl placed under it to catch the cooking liquid. Measure 1/2 cup of the cooking liquid and whisk it into the small bowl with the rest of the ingredients for the dressing. Then take 1/2 cup of the potatoes, mash them thoroughly using a potato masher or a fork, and whisk them into the dressing to thicken it.

Transfer the rest of the potatoes from the colander to a medium bowl. Pour the dressing over the potatoes. Add the chopped onion and bacon and toss gently so that the dressing coats the potatoes. Sprinkle the potato salad with dried or fresh parsley and toss again. Serve immediately, or keep in the refrigerator and reheat in the microwave before serving.

Sunday, September 19, 2010

Cooked Green Cabbage

I know it must seem like we eat a lot of cabbage. I guess we do, if you consider about once a week a lot. My reason for eating cabbage regularly, besides the fact that it's good for you, is that Naomi likes it. Naomi is our pickier eater, but she'll eat cabbage in whatever form I make it. This time I had a green cabbage, so I used white wine vinegar and lemon juice to add some flavor. I tried to take a picture of the cabbage, but it didn't turn out all that well, I think because I haven't yet adjusted my picture-taking to the fading light at dinnertime. I guess summer really is almost over when we have to turn the lights on to eat dinner at 6 pm.

Cooked Green Cabbage
serves 3 adults

Ingredients:

  • 1/2 of a small yellow onion, chopped, OR the white parts of 4 to 6 green onions, chopped
  • 2 Tbsp. canola oil
  • 1 pound of green cabbage, shredded (about half of a head of cabbage)
  • 2 Tbsp. white wine vinegar
  • 1 Tbsp. lemon juice
  • 1/2 tsp. sea salt
  • 1/2 tsp. granulated white sugar
  • 1 tsp. dried parsley (or 1 Tbsp. fresh parsley, chopped)
  • 2 Tbsp. water
Instructions:

If you are using a yellow onion, heat 1 tablespoon of the oil in a large non-stick frying pan over medium heat. Saute the onion until it has softened. While the onion is cooking, shred the cabbage. When the onion is tender, add the other tablespoon of oil, the shredded cabbage, vinegar, lemon juice, sea salt, sugar, and parsley. Toss so that the cabbage is coated completely with the oil, vinegar, and other ingredients. Then add the water and stir.

If you are using green onions instead of a yellow onion, heat the two tablespoons of oil at the beginning and then add the green onion with the rest of the ingredients when the oil is hot.

After you have stirred the ingredients together, cover the pan with a lid and let the cabbage cook for 10 to 15 minutes, stirring occasionally, until it has achieved the texture you prefer.

Wednesday, September 15, 2010

Broccoli (or Leafy Salad) with Basil Vinaigrette


Our basil plant has been getting quite large, so I've been looking for more ways to use basil. I stumbled upon the following recipe for basil vinaigrette, and it was so good that I want to remember it next year when we buy another basil plant. I've used the dressing on broccoli and on a leafy salad, and the flavors of the dressing have gone well with both. I bet the dressing would taste great on asparagus, too. When I'm cooking for just the four of us, I usually cut the recipe in half.

Basil Vinaigrette
serves 4 adults

Ingredients:

  • 1/2 tsp. Dijon mustard
  • 1/2 shallot, chopped, or 2 Tbsp. finely chopped yellow onion
  • 1/4 tsp. sea salt
  • 1/2 tsp. granulated white sugar
  • 1/4 cup roughly chopped basil leaves
  • 2 Tbsp. white wine vinegar
  • 1/4 cup and 2 Tbsp. olive oil
Instructions:

See the recipe link for the instructions.

Thursday, September 2, 2010

Double Chocolate Cookies


I like chocolate chip cookies. Yet even more than that I like double chocolate cookies, which are chocolate cookies with chocolate chips. If you couldn't tell, I have a thing about chocolate. The more the better, really. My rationalization for figuring out how to make wheat-free, dairy-free, soy-free, and egg-free double chocolate cookies right now is that my old cookie standby doesn't work anymore for our family. I used to make peanut butter cookies all the time, but then Naomi was diagnosed with a peanut allergy. So I tried making sunflower seed butter cookies, but they just don't taste quite the same, and Michael doesn't prefer them. And if you take out the egg, they really aren't at all like the chewy peanut butter cookies I used to make. Therefore, since peanut butter cookies don't work for us right now, I had to come up with a double chocolate cookie recipe instead.

My recipe is adapted from a recipe for chewy vegan chocolate chocolate chip cookies. What I like about these cookies, besides the chocolate, is that they are very easy and quick to make. From the time you start to the time that the cookies have cooled and are ready to be eaten is not more than 30 minutes. Be warned: in addition to being easy to make, these cookies are rather addictive. I only bake 12 at a time because otherwise I eat way too many.

Double Chocolate Cookies
makes as many cookies as you want

Ingredients for 12 cookies:
  • 2 Tbsp. rice milk
  • 1/2 Tbsp. Bob's Red Mill ground flax seed meal
  • 1/2 cup Bob's Red Mill Gluten-free flour
  • 3 Tbsp. Ghirardelli unsweetened cocoa
  • 1/4 tsp. baking soda
  • 1/8 tsp. sea salt
  • 3 Tbsp. granulated white sugar
  • 3 Tbsp. light brown sugar
  • 3 Tbsp. canola oil
  • 1/2 tsp. vanilla extract. Use Trader Joe's alcohol-free vanilla extract or another vanilla extract that does not have corn syrup and is preferably alcohol-free, since the alcohol could be derived from corn. Recently I have been using Rodelle Vanilla Flavor alcohol free all natural extract, which I found at Stop and Shop.
  • 1/4 cup dairy-free chocolate chips. I recommend Ghirardelli, Trader Joe's, or Enjoy Life semi-sweet chocolate chips.
Ingredients for 24 cookies:
  • 1/4 cup rice milk
  • 1 Tbsp. Bob's Red Mill ground flax seed meal
  • 1 cup Bob's Red Mill Gluten-free flour
  • 1/4 cup + 2 Tbsp. Ghirardelli unsweetened cocoa
  • 1/2 tsp. baking soda
  • 1/4 tsp. sea salt
  • 1/3 cup granulated white sugar
  • 1/3 cup packed light brown sugar
  • 1/4 cup + 2 Tbsp. canola oil
  • 1 tsp. vanilla extract. Use Trader Joe's alcohol-free vanilla extract or another vanilla extract that does not have corn syrup and is preferably alcohol-free, since the alcohol could be derived from corn. Recently I have been using Rodelle Vanilla Flavor alcohol free all natural extract, which I found at Stop and Shop.
  • 1/2 cup dairy-free chocolate chips. I recommend Ghirardelli, Trader Joe's, or Enjoy Life semi-sweet chocolate chips.
Instructions:

Preheat the oven to 350 degrees. Line a baking sheet with parchment paper. Heat the rice milk in the microwave and then stir in the flax seed meal.

In a medium bowl combine the flour, cocoa, baking soda, and salt. In a separate smaller bowl mix together the white sugar, brown sugar, canola oil, vanilla, and the rice milk and flax seed mixture. Stir the liquid ingredients together until completely combined. Then make a hole in the middle of the dry ingredients and pour in the liquid ingredients. Stir just until you don't see any more dry bits. Fold in the chocolate chips.

Then take a teaspoon and scoop rounded teaspoonfuls onto the parchment paper, leaving about two inches between each scoop of dough. Bake for 10 minutes. Let the cookies rest on the baking sheet for 5 minutes before transferring them to a cooling rack. If you have any cookies left after they have cooled completely, place them in an airtight container.

Tuesday, August 24, 2010

Baked Pork Sausages


Ever since I was a kid, I have preferred hot dogs to hamburgers. And ever since living in Germany for a year, I have preferred sausages. There's something about a hot sausage dipped in spicy mustard that tastes so good. Recently when I was at BJ's, I thought I would take a look at their sausages. I wasn't expecting to find one without any corn products, but, amazingly enough, I did. The ingredient label had perhaps five things on it: pork, salt, spices, and a couple other easily identifiable foods. I decided to take a chance and see if Michael could eat them. And he could, without any ill effects! I was quite excited because I have tried and failed at several brands of chicken sausages, which are labeled gluten-free but still must be contaminated with corn. So the lesson I've learned, and need to remember, is to buy only pork sausages, not chicken sausages, and to buy ones that contain only ingredients that I can identify.

It's still summer, so we could have grilled the sausages outside. However, it's been raining all week so far -- our first rain in quite a while, so I'm not complaining. But I did need to come up with another way of cooking the sausages, and I decided to bake them in the oven. It's so much simpler and less messy than cooking them on the stove. Tonight I made rosemary roasted potatoes and cooked red cabbage to go with the sausages -- a rather German or Austrian-themed meal. The girls ate every bite! We're raising the next generation to like their sausages with mustard, too.

Baked Pork Sausages
serves 2 adults and 2 small children

Ingredients:
  • 4 wheat-free and corn-free pork sausages
  • 2 yellow onions
Instructions:

Preheat the oven to 400 degrees. Peel 2 onions and slice them thickly into slices of even thickness. (I usually cut a medium onion into four slices, keeping all of the rings together in each slice.) Place them on the bottom of an 8"x8" Pyrex dish so that the onions cover the bottom of the dish. You might not use all of the onion slices. Then place the sausages on top of the onion slices so that the sausages are not touching one another. The purpose of the onion slices is to keep the sausages from burning on the bottom of the pan, and to provide a lovely side of onion to your sausage after it's cooked.

When the oven has preheated, bake the sausages for 20 to 30 minutes, depending on the thickness of the sausage, until an instant-read thermometer inserted into one of the sausages reads at least 160 degrees. Serve the sausages with the onion slices on the side.

Sunday, August 22, 2010

Balsamic-Marinated Flank Steak with Salsa Verde


When we visited my parents at the beginning of the summer, they grilled flank steak for us. The steak was so good that I wanted to try it at home. Since I didn't have all of the ingredients for making my mom's recipe, I decided to try this one that uses balsamic vinegar. Wow. This recipe is definitely a keeper. The flank steak turned out so tender and flavorful, and the salsa verde made it taste even better. (In case you were wondering, the salsa verde is the funny looking green stuff in the picture.) The capers are essential to the flavor of the salsa verde, so be sure to get some at the supermarket.

Balsamic-Marinated Flank Steak with Salsa Verde
serves 4 to 6 adults

Ingredients for the steak:

  • 1 1/2 lb. to 2 lb. flank steak (A 1 1/2-lb. steak was enough for 4 adults. A 2-lb. steak would be enough for 6 adults.)
  • 1/2 cup olive oil
  • 1/4 cup balsamic vinegar
  • 2 medium cloves garlic, minced (about 1 tsp.)
  • 5 sprigs of thyme or rosemary, chopped
  • kosher salt and black pepper
Ingredients for the salsa verde:
  • 2 small finely chopped shallots, or 1/4 cup finely chopped yellow onion
  • 6 cornichons, chopped, or 2 small pickles, chopped
  • 2 Tbsp. capers, drained. Look for a jar that does not contain citric acid.
  • 1/2 cup coarsely chopped flat-leaf parsley
  • 1/4 cup packed basil leaves
  • 1/2 cup packed cilantro leaves
  • 1 Tbsp. red wine vinegar
  • 3 Tbsp. extra-virgin olive oil
  • zest of 1 lemon
  • sea salt and black pepper to taste
Instructions:

Cut any excess fat off of the flank steak. In a small bowl combine the olive oil, balsamic vinegar, garlic and chopped herbs. Place the flank steak in a gallon-size Zip-loc bag and pour the marinade into the bag as well. Seal the bag, rub the marinade into the steak, and then place the bag in the refrigerator to marinate for 4-5 hours, or up to 24 hours.

For the salsa verde, combine all of the salsa ingredients in a food chopper or processor and pulse until it is smooth or reaches your desired consistency. Serve by letting people spoon some of the salsa over their steak.

When you are ready to grill the steak, remove it from the bag. Sprinkle the steak on both sides with salt and pepper. Grill the steak for 4-6 minutes on one side and 3-4 minutes on the second side. Then let the steak rest on a plate tented with aluminum foil for 10 minutes before cutting it into thin strips against the grain.

Friday, August 20, 2010

Rosemary Lemon Chicken


We tried a new chicken recipe tonight, and it turned out really well. Here is the link to the original recipe for rosemary lemon chicken. I didn't change anything about the recipe except for the kind of chicken I used. Michael has reacted multiple times to Perdue and other brands of regular chicken -- both whole chickens and boneless skinless chicken breasts. Therefore, we now are eating only kosher, organic, or "all natural" chicken, which Michael fortunately does not seem to react to. As a preventative measure, I still rinse the raw chicken really thoroughly in cold water before proceeding with the recipe.

Rosemary Lemon Chicken
serves 3 adults, or 2 adults and 2 children

Ingredients:

  • 1 lb. boneless skinless chicken breasts (3 half breasts depending on their size) that are organic, kosher, or all natural
  • 2 Tbsp. olive oil
  • 1/4 cup lemon juice
  • 2 cloves garlic, minced
  • 1/4 cup fresh rosemary, minced
  • 1/2 tsp. sea salt
Instructions:

See the original recipe for instructions on how to marinate and cook.

Tuesday, August 17, 2010

Chocolate Banana Muffins


I have made some additional tweaks to this recipe, so I wanted to email it out in its newer form. I hope you enjoy!

Baking without eggs? I feel like I'm back to square one. However, I have read that if Sabrina avoids eggs for a couple of years, she might outgrow her egg allergy and be able to eat them again without a reaction. In the mean time, I still want her to be able to eat muffins and cake, so I've been experimenting with egg-free muffin recipes. Yesterday's attempt was quite encouraging. I tried a recipe for chocolate banana muffins, and they turned out just like muffins are supposed to. Michael even said they were very tasty, and he's not usually all that excited about chocolate.

I have adapted my muffin recipe from the following recipe for chocolate banana muffins. If you can eat eggs and wheat, just use the original recipe.

Chocolate Banana Muffins
makes 6 or 7 muffins

Ingredients:

  • 1 Tbsp. Bob's Red Mill ground flax seed meal
  • 3 Tbsp. hot water
  • 1 cup Bob's Red Mill Gluten-free flour
  • 3 Tbsp. Ghirardelli unsweetened cocoa
  • 2/3 tsp. baking soda (or 1/2 tsp. and 1/8 tsp. if you don't have a 1/3 tsp. measuring spoon.)
  • 1/4 tsp. sea salt
  • 1/3 cup granulated white sugar
  • 1 cup mashed ripe banana. This is about 2 medium to large sized bananas.
  • 2 1/2 Tbsp. canola oil
  • 1 tsp. vanilla extract. Use Trader Joe's alcohol-free vanilla extract or another vanilla extract that does not have corn syrup and is preferably alcohol-free, since the alcohol could be derived from corn. Recently I have been using Rodelle Vanilla Flavor alcohol free all natural extract, which I found at Stop and Shop.
Instructions:

Preheat the oven to 400 degrees and grease 6 or 7 muffin tin cups using canola oil or Spectrum Organic shortening. Heat 3 tablespoonfuls of water in a cup or mug and then stir in the ground flax seed meal. Set the cup aside. In a medium-size bowl mix together the flour, cocoa, baking soda, and sea salt.

Mash the bananas on a plate and then put them in a small bowl. Add to the small bowl the sugar, canola oil, vanilla, and flax seed mixture. Stir thoroughly to combine. Make a hole in the middle of the flour mixture in the medium bowl and pour the liquid mixture from the small bowl into the medium one. Stir just until you see no traces of dry flour left.

Scoop the batter into the muffin tin cups and bake for 17 minutes, until a toothpick comes out mostly clean. Remove the muffins from the tin and let them cool on a wire rack.

Sunday, August 15, 2010

Chocolate Chip Cookies


I think Southern Living is now my favorite magazine. Why? Because the August 2010 issue contained a recipe for egg-free cookies, which I adapted to make the best chocolate chip cookies that I have managed to make with gluten-free flour and without butter. My previous attempts at gluten-free dairy-free chocolate chip cookies all turned into one large crunchy blob on the cookie sheet. Even when I refrigerated the dough to make sure that it was cold before baking, it still oozed into a dough monster once I put the round balls of dough in the oven.

I got so frustrated that I gave up trying to make chocolate chip cookies. Until I saw this recipe. Why did this recipe inspire me to try again? Because it contained an ingredient that I had never seen before in a cookie recipe: alcohol. I don't know much about food chemical reactions, but something in the alcohol caused the balls of dough to turn into perfectly shaped cookies. On top of that, the cookies were nice and chewy and didn't fall apart when we bit into them. What more could you ask for in a chocolate chip cookie?

My one caveat is that using the amount of alcohol called for in the original recipe gave the cookies a slightly odd, alcoholic flavor, so I modified the recipe to use half the original amount of alcohol. Even with half of the alcohol called for, the cookies still held together wonderfully, and they tasted great, too. The original recipe called for coffee liqueur, but I used rum because liqueurs can contain corn products.

Chocolate Chip Cookies
makes 18 cookies

Ingredients:

  • 2 Tbsp. hot water
  • 1/2 Tbsp. ground flax seed meal. I use Bob's Red Mill brand of flax seed meal.
  • 1/2 cup Spectrum Organic shortening
  • 3 Tbsp. granulated white sugar
  • 3 Tbsp. light brown sugar
  • 2 Tbsp. Bacardi Original Puerto Rican rum
  • 1 tsp. vanilla extract. Use Trader Joe's alcohol-free vanilla extract or another vanilla extract that does not have corn syrup and is preferably alcohol-free, since the alcohol could be derived from corn. Recently I have been using Rodelle Vanilla Flavor alcohol free all natural extract, which I found at Stop and Shop.
  • 1 1/3 cups Bob's Red Mill Gluten-free flour
  • 1/2 tsp. baking soda
  • 1/8 tsp. sea salt
  • 1/2 cup dairy-free chocolate chips. I recommend Ghirardelli, Trader Joe's, or Enjoy Life semi-sweet chocolate chips.
Instructions:

Preheat the oven to 375 degrees. Line a cookie sheet with parchment paper. Heat 2 Tbsp. of water in a cup and then add the ground flax seed meal and stir.

In the bowl of a Kitchen Aid mixer (or a large bowl if you are using a hand-held mixer) add the shortening. Turn the mixer on low speed and add the white sugar and brown sugar gradually, one tablespoon at a time, while keeping the mixer on low speed. Then pour the rum and vanilla extract into the mixing bowl and continue to mix on low speed until blended.

In a separate small bowl combine the flour, baking soda, and salt. Then take the cup of water and flax seed meal and pour it into the bowl with the creamed sugar and liquids. Mix on low speed until combined. Add the flour mixture to the rest of the ingredients and mix on low until well blended. Then fold in the chocolate chips using a spatula.

Place tablespoonfuls of cookie dough onto the baking sheet, leaving a couple of inches between each ball of dough. Bake the cookies for 10 to 12 minutes, until they are golden. Let the cookies cool on the baking sheet for 3 minutes before transferring them onto a wire rack to finish cooling.

Thursday, August 12, 2010

Grandma Robert's Potato Salad (without mayonnaise)


It's hard to believe now, but I never liked potato salad before I married Michael. To be more specific, I never liked potato salad until I tried the one that Michael's mom made using his Grandma Robert's recipe. That salad was so tasty that I immediately asked for the recipe and have been making it ever since. After Sabrina was diagnosed with her egg allergy, I knew that I needed to figure out a way to continue making this delicious potato salad, but without the mayonnaise called for in the original recipe. Tonight I tried a version that I think comes pretty close. Michael gave it the thumbs up, and Naomi even asked for seconds, which is a rare complement from her.

Grandma Robert's Potato Salad (without mayonnaise)
serves 4 adults

Ingredients:

  • 2 lb. Yukon Gold or thin-skinned white potatoes
  • 3 Tbsp. apple cider vinegar
  • 1 1/2 tsp. sea salt
  • 1/4 cup canola oil
  • 1/4 cup chopped yellow onion
  • dried parsley
Instructions:

In a large 12-inch non-stick skillet (preferably one that has a lid), combine 2 cups of water, 1 Tbsp. apple cider vinegar, and 1 tsp. sea salt. Stir to dissolve the salt. Peel the potatoes and cut into thin, 1/4-inch wide slices. Place the potato slices in the skillet so that they form 2 to 3 layers. The liquid will cover most, but not all, of the potatoes. Bring the liquid to a boil over high heat. Turn the heat down to medium-low and cover the pan. Cook for 15 to 20 minutes, until the potatoes are fork-tender. While the potatoes are cooking, finely chop about half of a small onion so that you have 1/4 cup chopped onion for the salad.

Drain the potatoes in a large colander with a large bowl placed under it to catch the cooking liquid. To make the dressing for the potato salad, measure 1/2 cup of the cooking liquid and pour it into a small bowl. Whisk into the cooking liquid 2 Tbsp. of apple cider vinegar, 1/2 tsp. sea salt, and 1/4 cup canola oil. Take 1/2 cup of the potatoes, mash them using a potato masher or a fork, and whisk them into the dressing to thicken it.

Transfer the rest of the potatoes from the colander to a medium bowl. Pour the dressing over the potatoes. Add the chopped onion and toss gently so that the dressing and onions coat the potatoes. Sprinkle the potato salad liberally with dried parsley and toss again. For a warm potato salad, keep the salad at room temperature and serve within 4 hours of making it. Or refrigerate the salad if you prefer to serve it cold.

Thursday, August 5, 2010

Asian-style Coleslaw


I have been on another cabbage kick recently. This recipe for Asian-style coleslaw came about as I was searching for new ways to make coleslaw without using mayonnaise. Sigh. I know some people don't like mayonnaise, but I really do. I know it sounds gross, but I could eat mayonnaise straight from the jar. However, mayonnaise is made from eggs, and since Sabrina was diagnosed with an egg allergy, I'm trying to limit our family's intake of egg products at dinner, when we all eat together.

Fortunately, a small amount of store-bought mayonnaise doesn't seem to bother Sabrina, so I am not banning mayonnaise completely from our meals. Oddly enough, store-bought mayonnaise is better for Sabrina than homemade, probably because of whatever has been done to the mayonnaise to make it shelf-stable for months on end. So mayonnaise is one of the few things that it's better if I don't make from scratch, since homemade mayonnaise contains lots of raw egg. In any case, occasionally I will use mayonnaise in dressings, but I'm trying to increase the number of salads and dressings I make that are mayonnaise-free.

This particular coleslaw is great with stir fries or other Asian dishes. The mild flavors of the rice vinegar and green onions contrast especially nicely with the spiciness of Thai food. I have to mention, based on personal experience, that the green onions are essential to this dish. If you don't have them, wait until you do before making the coleslaw. If you are really Asian, like my brother-in-law, you may enjoy sprinkling red pepper flakes on your portion.

Asian-style Coleslaw
serves 2 adults

Ingredients:

  • 3 cups of shredded green cabbage (about 1/3 of a small 2-pound cabbage)
  • 1/2 carrot
  • 6 to 8 green onions
  • 2 Tbsp. rice vinegar
  • 1 to 1 1/2 Tbsp. canola oil
  • 1 Tbsp. granulated white sugar
  • 1/2 tsp. sea salt
Instructions:

Finely cut the cabbage into thin strips and place in a medium bowl. Peel the carrot and grate it into the bowl using the large holes on a grater. Cut the root ends off of the green onions, finely chop the white parts of the onions, and transfer them to the bowl with the cabbage and carrot.

In a small bowl whisk together the rice vinegar, canola oil, sugar, and salt. Then pour the dressing over the vegetables, toss to coat, and let sit in the refrigerator for 1 hour before serving.

Monday, August 2, 2010

Banana Pancakes


I have been working on improving this recipe and have finally figured out how to get the pancakes to rise like regular pancakes with egg in them. I have modified the recipe below accordingly.

These banana pancakes are my second success at egg-free pancakes. I made them for us this past Saturday, and the pancakes were enjoyed by all. Sabrina has decided that she likes pancakes even better than muffins. What I like about these particular pancakes is that the banana flavor in the pancakes goes especially well with lots of pure maple syrup.

Banana Pancakes
makes 6 pancakes

Ingredients:

  • 1 Tbsp. flax seed meal. I use Bob's Red Mill whole ground flax seed meal.
  • 1/2 cup almond milk
  • 1 whole overripe banana (1/2 cup banana when mashed)
  • 1 Tbsp. canola oil
  • 1 Tbsp. honey
  • 1/2 tsp. vanilla extract. Use Trader Joe's alcohol-free vanilla extract or another vanilla extract that does not have corn syrup and is preferably alcohol-free, since the alcohol could be derived from corn. Recently I have been using Rodelle Vanilla Flavor alcohol free all natural extract, which I found at Stop and Shop.
  • 1 cup Bob's Red Mill Gluten-free flour
  • 1/2 tsp. baking soda
  • 1/4 tsp. cream of tartar
  • 1/8 tsp. sea salt
Instructions:

Microwave the milk until warm. Put the flax seed meal in the milk, stir, and let soak for a few minutes. Meanwhile, mash the banana on a plate and then put in a small bowl. Add to the bowl the canola oil, honey, and vanilla. Then pour in the milk and the flax seed meal. Whisk until completely combined. In a separate medium bowl sift together the flour, baking soda, cream of tartar, and sea salt. Pour the liquid ingredients into the bowl with the flour and whisk until combined and no traces of flour remain. Let the batter sit for ten minutes.

While the batter is resting, place a large non-stick pan over medium heat and let it heat up. When the pan is hot and the batter has rested for ten minutes, make a tester pancake using 1/4 cup of batter. Cook the pancake for 3 to 4 minutes on each side. Then cook the rest of the pancakes, using 1/4 cup of batter for each pancake.

Thursday, July 29, 2010

Indian-spiced Cabbage


Whenever I went to an Indian restaurant or ate Indian food at home, I used to wish for more vegetables or an obvious vegetable dish to go with the main course. Now, thanks to my friend Tiffany from church, I know what to make: Indian-spiced cabbage. For the past several years a group of us has gotten together to have Indian food for our Easter dinner. One year Tiffany made this Indian cabbage, and I liked it so much that I asked her for the recipe. I have modified it a bit so that it's easier to make with the ingredients I usually have on hand, but the flavor is pretty much the same. My version is inspired also by a "hot" Indian coleslaw recipe and a cabbage and carrot stir-fry recipe.

Indian-spiced Cabbage
serves 2 adults

Ingredients:

  • 2 Tbsp. canola oil
  • 1 small onion, finely chopped
  • 1/2 tsp. cumin seeds
  • 1/4 tsp. ground coriander
  • 1/4 tsp. curry powder
  • 1/2 tsp. sea salt
  • 1/2 tsp. granulated white sugar
  • dash of cayenne pepper
  • 4 cups of shredded green cabbage (about 1/2 of a small, 2 lb. head of cabbage)
  • 2 Tbsp. lemon juice (fresh is best, but bottled will do)
Instructions:

Heat 1 Tbsp. of canola oil in a large frying pan over medium heat. Finely chop the onion and then saute until tender. While the onion is cooking, chop the cabbage. Measure out the coriander, curry powder, salt, sugar, and cayenne pepper in a small bowl.

When the onion is soft, add the cumin seeds and stir constantly for about 30 seconds. Then add the other 1 Tbsp. of canola oil and pour in the rest of the spices from the small bowl. Stir constantly for about 1 minute. Add the shredded cabbage and cook, stirring frequently, for about 5 minutes, until the cabbage has softened to the texture that you prefer. Stir in the lemon juice and serve.

Saturday, July 24, 2010

Strawberry Rhubarb Pie

This post is long overdue, but I am finishing it anyway because I want to remember exactly how I made this strawberry rhubarb pie. Every spring for the past few years I have make at least one strawberry rhubarb pie, because I love the flavors of strawberry and rhubarb together. Some years I have more success than others, and I think that this year's pie is worth repeating. I actually made strawberry rhubarb pie twice this year, and can you believe that I forgot to take a picture of it both times? I'd like to blame the lack of a picture on the fact that the pie gets eaten so quickly. But, I do realize that I could have taken a picture of my own piece before digging in.

The first time I made the pie this year was for Michael's birthday in June. I learned the hard way that the rhubarb needs to be cut quite thin, otherwise the pieces of rhubarb don't get soft as quickly as the strawberry and you end up with crunchy rhubarb in your pie. And you don't want crunchy pie. The other thing I discovered is that if I baked the pie long enough to soften the thickly-cut rhubarb, the juices bubbled over and made a mess all over the bottom of my oven. Because I wanted to try to learn from my mistakes, and because I just really like strawberry rhubarb pie, I made it again when my sister Stacy and her husband Dave came to visit us over the July 4th weekend. This time the pie turned out just as I had hoped, and it was gone in about 24 hours.

Here are a couple of additional tips I've learned from experience. First, making a pie crust using gluten-free flour is an exciting endeavor (or, as Michael might prefer to say, an unbelievably frustrating endeavor). Gluten-free pie dough is very fragile and tends to break easily, so try to let go of your preconceptions of what the perfect pie crust should be like. It's normal to need to perform some minor surgery on the pie dough once it's in the pie plate. The second tip is to give yourself lots of time to make this pie. It takes quite a while to make the crust and to mix up the filling and the crumb topping. Then it takes even longer to bake the pie, and a while longer to let the pie cool. I would budget at least 3 hours for the whole process the first time you're making the pie.

Lastly, the crust for this pie was inspired by a recipe in Better Homes and Gardens New Cookbook. The filling was based on the following recipe for strawberry rhubarb pie. And the crumb topping was based on a recipe in the Better Homes and Gardens New Cookbook as well as the following crisp recipe.

Strawberry Rhubarb Pie
makes 1 9-inch pie

Ingredients for the pie crust:

  • 1 1/4 cups Bob's Red Mill Gluten-free flour
  • 1 Tbsp. granulated white sugar
  • 1/4 tsp. sea salt
  • 1/3 cup Spectrum Organic shortening
  • 5 Tbsp. ice water
Ingredients for the pie filling:
  • 1 lb. strawberries
  • 1 lb. rhubarb
  • 1/2 cup granulated sugar
  • 1/4 cup light brown sugar
  • 1 Tbsp. lemon juice
  • 1/4 tsp. sea salt
  • 1/4 cup quick-cooking tapioca
Ingredients for the crumb topping:
  • 1/2 cup Bob's Red Mill Gluten-free flour
  • 1/2 cup Bob's Red Mill Gluten-free oats OR 1/2 cup chopped pecans (make sure that the pecans are not coated in corn oil)
  • 1/2 cup to 3/4 cup packed light brown sugar (I'm not sure which amount I like better.)
  • 1/3 cup Spectrum Organic shortening
Instructions for making the crust:

Preheat the oven to 400 degrees. Take a drinking glass and fit it with water and several ice cubes. In a medium bowl, combine the first three ingredients for making the crust: the flour, sugar, and salt. Then cut in the shortening until the pieces are the size of small peas. Pour 5 tablespoons of water onto the mixture one at a time, tossing the mixture so that it becomes moistened all over. Use your hands to form the dough into a ball.

Lay a large dish towel on a flat surface and sprinkle it with some gluten-free flour. Place the dough on the towel and sprinkle the dough with a bit more of the flour. Then gently roll out the dough with a rolling pin until the dough is 3 or 4 inches wider in diameter than the top circumference of the 9-inch pie plate. Sprinkle the dough with more flour at any point in the rolling process if the rolling pin starts to stick to the dough. When the dough has been rolled enough, lay the pie plate face-down on top of the flattened dough. Grab the edges of the dish towel and gently pull them over the bottom of the pie plate (which is right now facing you). Grab the ends of the dish towel with one hand and quickly flip the entire dish towel and pie plate over so that the pie plate is now face up with the pie dough inside it. Gently press the dough into the pie plate and crimp the edges around the top of the pie plate.

To make the pie filling:


Rinse the strawberries and cut the green tops off. Cut the strawberries into 1/4-inch slices and place in a large bowl. Rinse the rhubarb and cut off the ends. Thinly cut the rhubarb into 1/8-inch slices and place in the same bowl. Add the other ingredients for the pie filling to the bowl -- the sugars, lemon juice, salt, and tapioca -- and stir to combine, so that the fruit is coated with remaining ingredients.

To make the crumb topping:

In a small bowl stir together the flour, oats or chopped nuts, and brown sugar. Cut in the shortening, or just use your fingers to combine the shortening with the other ingredients.

To complete the pie:

Pour the pie filling into the unbaked pie crust. Sprinkle the crumb topping evenly over the filling. Cover the entire pie with a piece of aluminum foil and place in the oven for 25 minutes. Remove the aluminum foil from the pie, turn the heat down to 375 degrees, and let the pie bake another 15 minutes. (If your oven tends to run hot, turn the heat down to 350 degrees so that the crumb topping doesn't burn.) Then check to see if the crumb topping is getting brown. If the crumb topping is browned but the pie is not bubbling, put the aluminum foil back over the pie and let it bake for another 10 to 15 minutes, unless the pie is bubbling. Remove the pie from the oven and let it cool on a wire rack for as long as you are able to wait. I actually think the pie tastes even better at room temperature the next day, although my second favorite option is to have the pie while it's still hot with some vanilla coconut-milk ice cream on the side.