Monday, December 26, 2011

Hot Artichoke Dip

Here is another post without a picture, but the good news is that I got a new camera for Christmas! I made this artichoke dip for New Year's Eve, before I had figured out how to use the new camera. However, I've been working on understanding the camera settings, so my next post should appear with a photo. I like this artichoke dip because it's served warm, which is what you want in the winter in New England. In addition, baking the chopped artichokes really enhances their flavor. The dip has a bit of Parmesan and Cheddar cheese, but since these are hard cheeses with little or no lactose, they seem to be okay for our family.

I started with this recipe for artichoke dip, but I modified it to make a smaller portion and to leave out the jalapenos. If you would prefer a spicier dip, just refer to the original recipe.

Hot Artichoke Dip
serves 2 to 3 adults

Ingredients:
  • 1 9-ounce box of frozen artichokes
  • 1/4 cup grated Parmesan cheese (from a block, not pre-grated)
  • 1/4 cup Hellmann's Real mayonnaise
  • 1 tsp. lemon juice
  • 1/4 tsp. sea salt
  • 1/4 tsp. minced garlic
  • dash of cayenne pepper
  • 1/4 cup shredded extra-sharp Cheddar cheese (from a block, not pre-shredded)
Instructions:

Preheat the oven to 350 degrees. Since most frozen artichoke hearts are coated in citric acid, thoroughly rinse the artichokes. Defrost them in the microwave until they are room-temperature.

While the artichokes are defrosting, grate the Parmesan cheese using a zester or the smallest holes on a grater. Measure 1/4 cup, not packed, and pour the cheese into a small bowl. Add to the bowl the mayonnaise, lemon juice, sea salt, minced garlic, and cayenne pepper. Stir to combine.

After the artichokes have defrosted, rinse them again thoroughly. Coarsely chop them in a food chopper or with a knife. Transfer the chopped artichokes to the small bowl and stir again to combine. Pour the dip into a small 1/2-quart baking dish that has been greased with canola oil. Bake for about 15 minutes, or until hot.

Preheat the broiler. Grate the Cheddar cheese and sprinkle it on top of the dip. Place the dish under the broiler for 1 to 2 minutes, until the cheese is melted, golden brown, and bubbly. Serve the dip with potato chips. Two brands of potato chips that are gluten-free and corn-free are Natural Lays and Utz.

Thursday, December 22, 2011

Roasted Sweet Potatoes

I meant to post this recipe in December, but December was more than a little busy. It was a month when I needed easy recipes that would taste good and feed my family, without taking much time to prepare. Since it was getting colder outside, I was also craving foods that are cooked in the oven. Roasted sweet potatoes fit the bill. I started with a Cook's Illustrated recipe from Fall Entertaining 2011, but I tweaked the cooking method so that the sweet potatoes would turn a nice roasted brown color. I would have a picture for you, but my camera died at the beginning of December. So instead, you can look at pictures on this recipe of similar roasted sweet potatoes. I have not yet tried their recommendation of topping the sweet potatoes with pecans, goat cheese, and celery, but it looks quite tasty.

You can double this recipe and the sweet potato rounds will all still fit on one baking sheet. If you like a bit more kick to your sweet potatoes, you could try sprinkling some spices or cayenne pepper onto the potatoes before roasting.

Roasted Sweet Potatoes
serves 2 adults and 2 small children, or about 3 adults

Ingredients:
  • 1 1/2 lb. sweet potatoes (about 3 medium or 2 large)
  • 1 Tbsp. canola oil
  • 1/2 tsp. sea salt
Instructions:

Peel the sweet potatoes and cut them into 1-inch rounds. (If in doubt, err on the thicker side for the rounds. If they are less than 1 inch thick, they get too cooked and mushy inside.) Transfer the sweet potato rounds to a medium bowl. Toss them with the canola oil and sea salt. Place the rounds in one layer on a baking sheet. **If your baking sheet is not non-stick, you might want to coat it lightly with 1 tablespoon of canola oil.

Then put the sheet in an unheated oven on the lower-middle rack. Turn the heat to 425 degrees and set the timer for 30 minutes. After 30 minutes, if the bottom of the rounds are not quite browned enough for your taste, put them back in for 5 more minutes. Then flip the rounds over and return the baking sheet to the oven for 10 more minutes. Remove the sheet from the oven and let the sweet potato rounds sit on the sheet for 5 minutes. Transfer to a dish and serve immediately.

Wednesday, December 14, 2011

Shepherd's Pie


This is Michael's new favorite dinner. He says that the leftovers are even better than when it's right out of the oven. What I like about this dish is that it uses vegetables that I usually have on hand. I also like the fact that you can make it two ways: you can simmer the meat and vegetables either in chicken broth or in red wine. Michael and I can't decide which version we like better, so I'm including the amounts for both in the ingredient list.

As you can see from my delay in posting, this has been a busy month. The girls kept us busy with a piano recital, school choral concert, and ballet recital. In addition, I had to write an 8-page paper for the class I took this fall, and of course there was the Christmas shopping that needed to get done. The one thing that didn't happen was a Christmas card and picture. We'll see if I'm able to get it done in the new year. If not, I'm taking this as my opportunity to wish you a very merry Christmas!

Shepherd's Pie
serves 4 adults

Ingredients:
  • 2 Tbsp. olive oil
  • 2 to 3 stalks of celery (about 1 cup when chopped)
  • 1 large onion
  • 2 to 3 carrots (about 1 cup when chopped)
  • 1/2 tsp. minced garlic
  • 1 lb. ground beef. I recommend using either 80% or 85% meat.
  • 1/2 tsp. dried rosemary
  • 1 tsp. dried parsley
  • 1/4 tsp. dried thyme
  • 1/4 tsp. ground black pepper
  • 1/2 tsp sea salt (if using chicken broth) OR 1 tsp. sea salt (if using wine and water)
  • 1 cup of Imagine organic chicken broth OR 1/2 cup red wine and 1/2 cup water. (I use an inexpensive jug of Carlo Rossi Burgundy.)
  • 1 Tbsp. tomato paste. Try to find one that does not contain citric acid.
  • 1 cup frozen peas
  • 1 Tbsp. kosher salt (for the water)
  • 1 1/2 lb. Russet potatoes
  • 1/3 cup olive oil
  • 1/4 tsp. minced garlic
  • 1/4 tsp. black pepper
  • 1/2 tsp. sea salt
  • 2 Tbsp. chicken broth OR potato water

Instructions:

Preheat the oven to 400 degrees. Place a large pan over medium heat and add the olive oil. Chop the celery, onion, and carrots. Add the vegetables to the pan and saute until softened.

While the vegetables are sauteing, peel the potatoes and cut them into 1 to 1 1/2-inch cubes. Place the potato cubes in a medium pot and fill the pot with water until it covers the potatoes by about an inch. Stir the kosher salt into the water, and place the pot over high heat. (Then add the minced garlic to the olive oil to let the olive absorb the garlic flavor.) Bring the water to a boil. Reduce the heat to medium-high and cook the potatoes for 10 to 15 minutes, until they are tender and offer no resistance to a knife. When the potatoes are done cooking, transfer them to a colander to drain for 2 minutes. If you are using the wine and water, reserve 2 Tbsp. of the potato water before pouring the rest away. Pour the potatoes back into the empty pot. Add the olive oil and minced garlic to the pot and mash with a potato masher. Add the pepper, sea salt, and the chicken broth or potato water. Stir to combine.

Returning to the vegetables, when they have become soft, add the garlic and stir for 30 seconds. Then transfer the vegetables to a plate. Increase the heat to medium-high. And the ground beef and cook, stirring frequently, until the meat has browned. Drain the fat from the pan. Then add to the pan the sauteed vegetables, rosemary, parsley, thyme, pepper, and salt. Stir to combine. Whisk together the chicken broth (OR wine and water) and the tomato paste. Pour the liquid into the pan with the beef and vegetables. Stir and bring to a simmer over medium heat. Then reduce the heat, cover the pan, and let simmer for 10 minutes.

Stir in the peas and pour the entire beef mixture into an 8x8 Pyrex pan (or other 2-quart baking dish) that has been lightly greased with olive oil. Spread the mashed potatoes over the top of the beef mixture. Make sure that the potatoes cover the entire top, all the way to the edges. Place the dish in the oven and bake for 25 to 30 minutes, until the ground beef mixture is bubbling and the potatoes are golden brown. Let cool 10 to 15 minutes before serving.

Tuesday, December 6, 2011

Chocolate Chip Pecan Pie


Another favorite food I remember from growing up is chocolate pie. For my birthday I used to frequently request chocolate chess pie, and in recent years I've asked my mom to make chocolate pecan pie when I visit for Thanksgiving or Christmas. This Thanksgiving we stayed in New Hampshire, but I still got a craving for chocolate pecan pie. I wanted it enough that I decided to make it myself, but I needed to figure out how to make it dairy-free. That way I could eat as large a piece as I wanted without any ill effects. I found the following recipe for rich chocolate pecan pie, which was already dairy-free and just needed a little modification to make it wheat-free and corn-free as well. I took the pie to our pot-luck Thanksgiving dinner with friends, and I think it was a success since there was only one small piece left to take back home.

I recommend toasting the pecans in the oven because it really enhances the pecan flavor, but you don't have to. If you do, you need to let the pecans cool before mixing them together with the chocolate chips. I failed to think of that the first time I made the pie, and you can imagine what happened to the chocolate chips when they touched the hot pecans. Fortunately, it still tasted great, even if it didn't look quite the same.

Chocolate Chip Pecan Pie
makes 1 9-inch pie

Ingredients for the pie crust:

Ingredients for the pie filling:

  • 8 ounces (about 2 cups) of raw chopped pecans or pecan quarters. Make sure that the ingredient list just says pecans. Some brands coat their pecans in corn oil.
  • 1 cup dairy-free semi-sweet chocolate chips. I recommend Ghirardelli, Trader Joe's, or Enjoy Life brand.
  • 4 eggs
  • 1/2 cup granulated white sugar
  • 1/2 cup light brown sugar, packed
  • 1/2 cup brown rice syrup. I used Lundberg Sweet Dreams organic brown rice syrup.
  • 1 1/2 tsp. vanilla extract. Use Trader Joe's alcohol-free vanilla extract or another vanilla extract that does not have corn syrup and is preferably alcohol-free, since the alcohol could be derived from corn. Recently I have been using Rodelle Vanilla Flavor alcohol free all natural extract, which I found at Stop and Shop.
  • 1/4 tsp. sea salt
Instructions:

Preheat the oven to 350 degrees. Lightly grease a baking sheet with canola oil. Place the pecans in a single layer on the sheet and put in the preheated oven for 4 to 5 minutes, until the pecans are fragrant. Watch the pecans carefully while they are in the oven so that they don't get scorched. Transfer the pecans to a plate and set them aside to cool.

Increase the oven temperature to 375 degrees. Make the crust following the instructions given here. Make the filling by whisking together the eggs, white sugar, light brown sugar, brown rice syrup, vanilla extract, and sea salt. If your brown rice syrup is cold, it's much easier to work with if you warm it up slightly in the microwave before trying to mix it with the other ingredients. (This is also something I learned the hard way.)

When the pecans have cooled to room temperature, mix them together with the chocolate chips. Spread the pecans and chocolate chips evenly over the bottom of the pie crust. Then pour the filling over the top of the of the pecans and chocolate chips. Cover the edge of the crust with aluminum foil. Place in the oven and bake at 375 degrees for 30 minutes. Remove the foil and bake for 20 more minutes, until the crust is browned and the top of the filling is set.

Let the pie cool for at least 30 minutes before serving. The original recipe suggests making a caramel sauce to go with the pie. I haven't tried making the sauce yet, but it looks like it would be really tasty.

Tuesday, November 29, 2011

Green Beans Almandine


One of the vegetable dishes I remember enjoying as a kid is green beans almandine. This November I decided that I wanted to learn how to make it myself. Toasting almonds couldn't be that hard, right? The only other question was whether the girls could eat almonds without having an allergic reaction. They hadn't reacted to almond milk or almond flour, so they probably would be just fine eating toasted blanched almonds. But you never know. We took the plunge and had them try the almonds. As I had hoped, the girls were fine and didn't react at all. Hooray! Now if I can only get my act together and take them to the allergist for further testing, maybe we can try pecans this coming year.

If you make this dish for us, please get blanched almonds. I haven't tried giving the girls almonds with the skins still on and don't know if they would react to the almond skins or not.

Green Beans Almandine
serves 3 to 4 adults

Ingredients:

  • 3/4 lb. green beans
  • 1 Tbsp. olive oil
  • 2 Tbsp. blanched almonds
  • 1/4 tsp. sea salt
  • 1/4 tsp. black pepper
Instructions:

Steam the green beans until they are tender-crisp. While the green beans are steaming, heat the olive oil in a medium sauce pan over medium heat. Add the almonds and stir constantly, tossing the almonds, until they are fragrant and have browned. Remove the pan from the heat. Stir in the salt and pepper. When the green beans are done, toss them in the pan with the almonds and oil. Serve immediately.

Sunday, November 27, 2011

Chocolate Cupcakes with Chocolate Frosting (Improved)


Last year was my first time attempting egg-free chocolate cupcakes. The cupcakes tasted good, but they crumbled more than I would have liked. This year Sabrina again wanted chocolate cupcakes for her birthday, so I decided to try out a new recipe. I started with a recipe for super easy, super moist chocolate cupcakes, which I tweaked to make wheat-free and corn-free. Voila! The result really was a moist and tasty cupcake that didn't crumble very much either. This is now my go-to cupcake recipe.

If you prefer, you also can use the recipe to make an 8"x8" cake, but you'll need to adjust the baking time. In addition, if you have coffee on hand, you can use 1 cup of hot coffee instead of the water and Starbucks Via. The instant coffee is just easier for us since we're not coffee drinkers.

Chocolate Cupcakes with Chocolate Frosting (Improved)
makes 12 cupcakes or 1 8x8 cake

Ingredients for the cupcakes:

  • 1 cup hot water
  • 1/4 cup flax seed meal. (I use Bob's Red Mill brand.)
  • 1 1/2 cups Bob's Red Mill gluten-free flour
  • 1/4 cup unsweetened cocoa (I like the taste of Ghirardelli.)
  • 1 tsp. baking soda
  • 1/2 tsp. sea salt
  • 1 tsp. Starbucks Via decaf instant coffee
  • 1 cup granulated white sugar
  • 1 Tbsp. apple cider vinegar
  • 1/4 cup + 2 Tbsp. canola oil
  • 2 tsp. vanilla extract. Use Trader Joe's alcohol-free vanilla extract or another vanilla extract that does not have corn syrup and is preferably alcohol-free, since the alcohol could be derived from corn. Recently I have been using Rodelle Vanilla Flavor alcohol free all natural extract, which I found at Stop and Shop.
Ingredients for the frosting:
  • 1 cup dairy-free semi-sweet chocolate chips. I recommend Ghirardelli, Trader Joe's, or Enjoy Life brand.
  • 1/2 cup canola oil
  • 2 Tbsp. agave syrup or honey
  • 1 Tbsp. vanilla extract
  • pinch of sea salt
Instructions for the cake:

Preheat the oven to 375 degrees. Place cupcake liners in a muffin tin. Heat the water in the microwave until it is hot. Stir in the flax seed meal and set aside.

In a medium bowl sift together (pressing through a sieve or using a whisk) the flour, cocoa powder, baking soda, sea salt, and instant coffee. In a separate small bowl, add the white sugar, apple cider vinegar, canola oil, vanilla extract, and water and flax seed mixture. Whisk until thoroughly combined. Pour the wet ingredients into the bowl with the dry ingredients. Stir until no trace of flour remains.

Pour a level 1/4 cup of batter into each cupcake liner. Place the muffin tin in the oven and bake for 15 minutes. Remove the tin from the oven and check to make sure the cupcakes are done using a toothpick: very few if any crumbs should cling to the toothpick when poked into the center of a cupcake. Let the cupcakes cool for a couple of minutes in the muffin tin before removing them to cool fully on a rack.

When the cupcakes have cooled off completely, spread the frosting over them. Add sprinkles, too, if you would like. At Whole Foods I found India Tree brand sprinkles that are made with cane-sugar crystals and are corn-free.

Instructions for the frosting:

Place a small saucepan over low heat. Add the chocolate chips and canola oil to the pan. Stir frequently, until the chocolate chips have just melted. Remove the pan from the heat and stir in the agave syrup, vanilla extract, and sea salt.

Pour the liquid from the pan into the bowl of a standing mixer (or another mixing bowl if you use a hand-held mixer). Place the bowl in the refrigerator for 20 minutes so that the liquid cools and thickens slightly. Using the whisk attachment, beat the liquid on medium speed until it lightens in color and thickens to a spreadable consistency. If the liquid does not seem to be thickening, place it in the freezer for 1 to 2 minutes to cool it down further. Then try mixing it again. When the liquid has turned into a frosting consistency, spread the frosting over the cupcakes or cake.

Tuesday, November 15, 2011

Banana Berry Smoothie


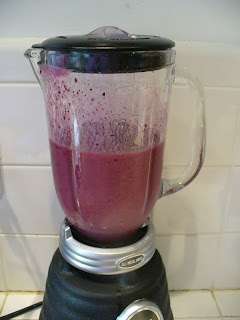
I got on quite a smoothie kick in college, when I could order one at Collis Cafe and have it made for me on the spot. Since then, I haven't had many smoothies, mostly because I've been too lazy to make my own. I finally decided that, since so many people make smoothies at home, it really couldn't be all that hard or require all that much effort. And it doesn't! After a few tries, I came up with the following recipe that Sabrina and I both like. Naomi tried it but didn't prefer it because of her aversion to all foods that are too cold. Sabrina and I don't mind, though, because it means more smoothie for us!

Banana Berry Smoothie

Ingredients:

  • 1 cup almond milk (or you could try So Delicious coconut milk)
  • 1 to 2 Tbsp. honey
  • 1 ripe banana
  • 1 cup frozen unsweetened strawberries
  • 1/2 cup frozen wild blueberries
  • 2 tsp. lemon juice
Instructions:

Add the almond milk and honey to the blender. Blend for a few seconds. Chop the banana into chunks and add to the blender, along with the strawberries, blueberries, and lemon juice. Blend until it has turned into a smoothie consistency. Pour and serve.

Thursday, November 3, 2011

Raspberry Chocolate Chip Baked Oatmeal


This is my latest baked oatmeal creation. It started when I tried a recipe for oatmeal with cocoa powder and raspberries. The girls and I liked the raspberry flavor but didn't like the taste of the cocoa powder mixed into the oatmeal. We wanted more of a rich chocolate taste to complement the tartness of the raspberries. So I opted for chocolate chips, which make almost any breakfast better. I started off with 1/2 cup of raspberries, but the girls and I decided that we like it better with one whole cup. Now every bite is a combination of melted chocolate and tart raspberry goodness. Breakfast is definitely my favorite meal of the day, even when it's still dark out when we're eating it.

Raspberry Chocolate Chip Baked Oatmeal
serves 4

Ingredients:
  • 1 1/2 cups Bob's Red Mill gluten-free oats
  • 1 1/3 cups almond milk
  • 2 Tbsp. brown sugar
  • 2 Tbsp. unsweetened applesauce
  • 2 Tbsp. canola oil
  • 1/4 tsp. baking soda
  • 1/2 tsp. cream of tartar
  • 1/2 tsp. vanilla extract. Use Trader Joe's alcohol-free vanilla extract or another vanilla extract that does not have corn syrup and is preferably alcohol-free, since the alcohol could be derived from corn. Recently I have been using Rodelle Vanilla Flavor alcohol free all natural extract, which I found at Stop and Shop.
  • 1/8 tsp. sea salt
  • 1/3 cup dairy-free semi-sweet chocolate chips. The two kinds I use that do not contain milk fat are Trader Joe's semi-sweet chocolate chips and Ghirardelli semi-sweet chocolate chips.
  • 1 cup frozen raspberries
Instructions:

The night before, measure the oats into a small bowl. Warm the almond milk in the microwave and pour over the oats. Stir and cover the bowl with a plate.

In the morning preheat the oven to 400 degrees. Add the brown sugar, applesauce, canola oil, baking soda, cream of tartar, vanilla, and salt to the bowl and stir until combined. Then stir in the chocolate chips and frozen raspberries. Pour the mixture into four 7-ounce ramekins. (It's a little more than 1/2 cup per ramekin.) Place the ramekins in the oven and bake for 25 minutes. Remove the ramekins from the oven and let the oatmeal cool for a couple of minutes before serving.

You could also try baking the oat mixture in an 8"x8" Pyrex pan if you don't want to use ramekins. You may need to decrease the oven temperature and increase the baking time, but I'm not sure since I haven't tried baking the oatmeal this way.

Monday, October 31, 2011

Mexican Lentils and Rice


This is another one of those foods that isn't much to look at, but tastes really good. I've been making this dish since the second year Michael and I were married, when I was looking for Mexican-inspired foods that didn't contain corn. Since I didn't know how to cook when I got married, the fact that I felt comfortable making this dish is a good indication that it's easy to make. What I also like about Mexican lentils and rice is that it's a nice vegetarian dish all by itself, or it goes well as a side dish with grilled cilantro lime chicken or other Mexican-themed meat dishes. You can make it with or without the shredded cheese on top.

The original recipe called for one packet of taco seasoning mix; however, this doesn't work for my family since all of the mixes I've found contain one or more of the following: corn, wheat, dairy, soy, or citric acid. I searched for homemade taco seasoning mixes and came up with the spice mixture included in my recipe below. If you would like to make the recipe with a taco seasoning packet instead of my spice mix, just omit all of the herbs, spices, and salt in the ingredient list.

Mexican Lentils and Rice
serves 4 to 8 adults (depending on whether it's a main dish or side dish)

Ingredients:

  • 1 cup of lentils
  • 1 large onion
  • 1 celery stalk
  • 1 medium carrot
  • 4 cups of water
  • 1 rice-cooker cup (or 3/4 cup using a regular measuring cup) uncooked long-grain white rice
  • 1 1/2 tsp. chili powder
  • 1/2 tsp. ground cumin
  • 1/4 tsp. paprika
  • 1/4 tsp. onion powder
  • 1/4 tsp. black pepper
  • 1/4 tsp. dried oregano
  • 1/4 tsp. garlic powder
  • 1 1/2 tsp. sea salt
  • 1/8 tsp. cayenne pepper (or less if you don't prefer it as spicy)
  • 1 6-oz can of tomato paste. Try to buy one that contains just tomatoes and no citric acid.
  • optional: 1 small can Lindsay Naturals sliced olives. (Most other brands contain ferrous gluconate, which comes from corn.)
  • optional: 1/2 to 1 cup grated extra-sharp Cheddar cheese. Buy a block of cheese and not pre-grated cheese, which contains corn products to prevent clumping.
Instructions:

Put the lentils in a bowl and fill the bowl with water to soak the lentils.

Throughly rinse the rice: Put the rice in a medium bowl and fill the bowl with water. Swish the rice around in the water with your hand. The water will turn whitish in color as the rice starch comes off the rice into the water. Then pour the starchy water out into the sink and fill the bowl with water again. Do this four or five times, until the water remains mostly clear even after having the rice stirred around in it. Then drain the water from the rice, transfer the rice to a rice cooker, add water, and let it cook.

Finely chop the onion, carrot, and celery. Pour four cups of water into a 4-quart pot. Add the chopped vegetables. Stir and bring to a boil over medium-high heat. When the water has come to a boil, drain the water from the lentils, rinse thoroughly in a colander or sieve, and add the lentils to the pot. Reduce the heat to medium-low or low, cover with a lid, and let simmer for 30 to 40 minutes, until the lentils and vegetables are fully cooked and tender.

Halfway through the cooking time for the lentils and vegetables, preheat the oven to 375 degrees. Grease a 2-quart Pyrex dish (the 8"x8" square one) or casserole dish with canola oil. Measure out all of the spices.

When the lentils and vegetables are done, remove the pot from the heat. Stir in the spices, tomato paste, cooked rice, and olives. Pour the mixture into the greased dish. Place in the oven for 30 minutes, until the liquid is bubbling and has been mostly absorbed. If you would like to add shredded cheese, sprinkle it on top halfway through the baking time. After removing the dish from the oven, let it rest for 5 to 10 minutes before serving.

Tuesday, October 25, 2011

Quinoa

I've been making quinoa for a few years now, but I've struggled to make it consistently good. Sometimes it would turn out really well, but sometimes it would end up too sticky and wet. And sometimes the quinoa grains just would not unfurl, stubbornly staying hard and crunchy. This summer I finally decided to branch out from the instructions on the Trader Joe's box and search the internet for a reliable recipe. I tried several different methods, and here is the one I like the best. The other great this about this recipe is that soaking and then rinsing the quinoa before cooking somehow gets rid of the coating or residue that Michael sometimes reacts to. So please soak and rinse! :) If you want to add quinoa to a stew or soup, I recommend soaking and rinsing it before cooking it in the liquid of the stew or soup.

Quinoa
serves 4 adults

Ingredients:
  • 1 cup quinoa
  • 1 1/2 cups water
  • 1/2 tsp. sea salt
Instructions:

Measure the quinoa and pour it into a medium-size bowl. Fill the bowl with water, stir, and let the quinoa soak for 5 minutes. Stir again and then pour the water and quinoa through a sieve to drain the water from the quinoa. Rinse the quinoa under water and transfer to a 2-quart pot.

Add 1 1/2 cups of water and 1/2 teaspoon sea salt to the pot and stir. Bring the water to a boil. Then reduce the heat to low, cover the pot, and let the water simmer for 15 minutes. Remove the quinoa from the heat and let it sit in the pot, still covered, for 5 minutes. Then fluff the quinoa and serve.

Thursday, October 13, 2011

Chocolate Chip Cookies


I've been playing with this recipe since the summer, and I think I'm finally going to call it good. I started with the following recipe for gluten-free chocolate chip cookies, but I modified it to suit our taste and to make it corn-free. I'm really happy with how my recipe turned out -- these cookies are amazingly good for not having any butter or egg. What I'm still mulling over is the fact that the cookies are great when they're eaten warm, right out of the oven, but they're not nearly as good the next day. Don't get me wrong, the cookie are still good the second day, but they're not that warm cookie perfection. I need to keep in mind that this is only a flaw if you can't eat all of the cookies in one day. :)

My other quandary has been at what temperature and how long to bake the cookies. I've decided just to leave the decision up to you. If you like the cookies to be a little crunchy on the outside and soft and chewy on the inside, then bake them at 350 degrees for 10 to 12 minutes, until just golden brown. If you like your cookies a bit crunchier, then bake them at 375 degrees for 10 minutes. And if you prefer your chocolate chip cookies to be "soft baked," then use just 1/2 teaspoon cream of tartar, instead of 1 teaspoon, and bake them at 350 degrees for 10 to 12 minutes.

Chocolate Chip Cookies
makes about 18 cookies

Ingredients:
  • 1 cup Bob's Red Mill gluten-free flour
  • 1 Tbsp. flax seed meal. I used Bob's Red Mill brand.
  • 1/2 tsp. baking soda
  • 1 tsp. cream of tartar
  • 2 Tbsp. granulated white sugar
  • 3 Tbsp. unsweetened applesauce
  • 1/4 cup Spectrum organic shortening. I use this palm shortening because we still react a bit to regular shortening, which is made from soybean oil.
  • 1/2 tsp. vanilla extract. Use Trader Joe's alcohol-free vanilla extract or another vanilla extract that does not have corn syrup and is preferably alcohol-free, since the alcohol could be derived from corn. Recently I have been using Rodelle Vanilla Flavor alcohol free all natural extract, which I found at Stop and Shop.
  • 1/2 cup packed light brown sugar
  • 1/4 tsp. sea salt
  • 2/3 cup dairy-free semi-sweet chocolate chips. The two kinds I use that do not contain milk fat are Trader Joe's semi-sweet chocolate chips and Ghirardelli semi-sweet chocolate chips.
Instructions:

Preheat the oven to 350 degrees (or 375 degrees if you want crunchier cookies). Line a baking sheet with parchment paper.

Sift the flour into a medium bowl. Whisk in the flax seed meal, baking soda, and cream of tartar. Set aside. Into a small bowl add the white sugar, applesauce, shortening, vanilla extract, brown sugar, and sea salt. Whisk these ingredients together until they are thoroughly combined and the mixture has become light and fluffy. Pour the sugar and shortening mixture into the flour mixture and stir until no traces of flour remain. Then stir in the chocolate chips.

Using a cookie scoop (which holds about 1 1/2 Tbsp. of dough), scoop balls of cookie dough and place them on the baking sheet about 2 inches apart. These cookies spread quite a bit, so be sure not to place the balls of dough too close together. I usually bake just 9 cookies per baking sheet. Bake one sheet of cookies at a time for about 10 to 12 minutes, until the cookies are just turning golden brown around the edges. Let the cookies cool for about 3 minutes on the baking sheet before transferring them to a wire rack.

The cookies are best eaten while still warm. If you have any leftover, place them while still warm in an airtight container. This helps to prevent them from becoming stale.

Wednesday, October 12, 2011

Apple Baked Oatmeal and Michael Timothy's


Apple Baked Oatmeal

My parents came to visit us for the Columbus Day weekend. We had a great time enjoying the warm weather -- going to the playground, playing in the pool in the backyard, and visiting Parlee Farms to go apple and pumpkin-picking. Since we now have a lot of apples to eat up, I decided to add apples to our maple baked oatmeal this morning. Wow! It was so good that I think I'm going to make the same thing for breakfast tomorrow. I peeled one medium apple and cut it into 1/8" slices. Then I cut those slices into small 1/2-inch squares and put between 1/4 and 1/3 cup of apple squares into the bottom of each ramekin. Next I poured the oatmeal mixture on top of the apple pieces and put the ramekins in the oven, following the instructions from the original recipe.


Michael Timothy's

Michael and I also had the special treat of going out to eat while my parents babysat the girls. We decided to try out what used to be Michael Timothy's, which they're now calling MT's Local. We hadn't been in years, but I thought we'd try it since the online menu looked promising. Michael and I were impressed with the new decor, menu options, and food. The waitress was very aware of food allergies and intolerances, and the chefs were able to cater easily to our requests. What Michael and I enjoyed just as much as the food, though, was their weekly wine flight. Each week they have a flight of three 2-ounce servings of wine. If you prefer, you can create your own flight from any of the wines they offer by the glass. The wines were quite good, and it was a fun way to combine dinner with some wine-tasting. We look forward to going back to try more items off of their food menu and to try a different wine flight.

Friday, September 30, 2011

White Wine and Paprika Vinaigrette (or Taco Salad Vinaigrette)

I wish I had a picture of this vinaigrette to post on the blog because it has a great orangey color. We like to eat this salad with Mexican food, but it would also go nicely with Hungarian or German foods that use paprika. The vinaigrette also works as a dressing for taco salad. Just top the salad with some ground beef cooked with taco seasoning. You could add cubed avocado, shredded extra-sharp Cheddar cheese, and salsa. Since regular tortilla chips are made from corn, we eat our taco salad with potato chips instead.

White Wine and Paprika Vinaigrette
serves 2 adults and 2 small children

Ingredients:
  • 2 Tbsp. white wine vinegar. I use Acetaia Bellei brand since Cook's Illustrated recommended it.
  • 1 tsp. honey
  • 1/2 tsp. paprika
  • 1/4 tsp. dry mustard
  • 1/8 tsp. black pepper
  • 1/8 tsp. sea salt
  • 1/4 cup canola oil
  • 1 large Romaine heart
  • 1 can of sliced olives. Use Lindsays Naturals or another brand that does not contain ferrous gluconate.
  • cherry or grape tomatoes
Instructions:

Whisk together the white wine vinegar, honey, paprika, mustard, black pepper, and sea salt. Then whisk in the canola oil.

Rinse the Romaine lettuce leaves and rip them into bite-size pieces. Dry them in a salad spinner or with a towel. Transfer the lettuce to a serving bowl. Pour the vinaigrette over the lettuce and toss so that the dressing coats all of the leaves. Serve immediately.

Thursday, September 29, 2011

Mexican Rice


This is another dish I started playing with over the summer, beginning with this recipe. However, the original recipe called for chicken broth, and I like to avoid using chicken broth for side dishes when I can. The organic chicken broth I have to buy is expensive, and it can be hard to find. So I decided to try to increase the flavor of the rice without using any broth. With the addition of spices and a little extra salt, Michael and the girls think this rice is a hit. The bright color is just a bonus. :)

The other thing I've been working on this summer is how to prepare rice in general. Over the past year Michael has become more sensitive to rice and will sometimes react to it. I think it might be either something sprayed on the rice or something in the natural rice starch coating. The trick I've found to make rice safe for Michael to eat is to rinse it thoroughly in cold water. I put the rice in a large bowl and fill the bowl with water. Next I swish the rice around in the water with my hand. The water will turn whitish in color as the rice starch comes off the rice into the water. Then I pour the starchy water out into the sink and fill the bowl with water again. I do this four or five times, until the water remains mostly clear even after having the rice stirred around in it.

Mexican Rice
serves 3 to 4 adults

Ingredients:
  • 2 Tbsp. olive oil
  • 1 small yellow onion
  • 1 tsp. minced garlic
  • 1 tsp. ground cumin
  • 1 tsp. chili powder
  • 1 tsp. sea salt
  • 1/8 tsp. black pepper
  • 1 cup long-grain white rice
  • 1/4 cup tomato paste. Try to get a can with just tomato and no added citric acid.
  • 1 3/4 cups water
  • 1/2 tsp. dried oregano
  • 1 Tbsp. lime juice (optional)
  • 1 Tbsp. fresh cilantro, chopped (optional)
Instructions:

Place a 2-quart pot over medium heat. Add 1 tablespoon of olive oil to the pot to heat up. Finely chop the onion and add to the pot. Saute, stirring occasionally, until the onion has softened. While the onion is sauteing, pour about 2 cups water into a kettle and bring to a boil. Measure out the cumin, chili powder, salt, and pepper into a small bowl. Rinse the rice thoroughly in a large bowl with cold water until the water runs clear. Drain the water from the rice.

When the onion is soft, add the garlic to the pot and stir for 30 seconds. Then add the spices and 1 more tablespoon of olive oil, and stir for 30 more seconds. Add the rice and cook, stirring frequently, for about 2 minutes. Then add the tomato paste and stir so that the paste thoroughly covers the rice. Measure out 1 3/4 cups boiling water and pour into the pot. Add the oregano and stir the rice and water mixture briefly to make sure that the rice doesn't stick to the bottom of the pot.

Bring the water in the pot back to a boil over medium heat. Cover the pot with a lid and reduce the heat to low. Cook covered for 15 minutes. Then stir the rice and any liquid that is still on top, cover the pot again, and cook for 5 more minutes. Remove the pot from the heat, stir the rice, recover the pot, and let the rice sit covered for 5 minutes. Then add the chopped cilantro and lime juice and serve.

Wednesday, September 28, 2011

Cilantro Lime Chicken


As you can tell by my lack of posts this past month, September was a busy time for us. The girls and I were all getting used to their new school schedule, especially getting up at six in the morning! Needless to say, by the time each evening rolled around, I was too tired to work on the blog. However, now that October is here, I think I'm starting to get into the swing of things. And I really want to share some of the recipes I've been trying out over the past month.

I was inspired to come up with this recipe because I had some extra cilantro lying around that I didn't want to go to waste. Back before we had kids, I used to make a recipe for grilled cilantro lime chicken. However, most of the flavor for that dish came from the cilantro lime butter that was spread all over it. Since we're trying to avoid consuming as much dairy now, I wanted to increase the flavor of the chicken itself so that I wouldn't need to spread butter all over it to make it taste good. On a hunch, I started with my recipe for rosemary lemon chicken and modified it to use cilantro and lime instead. Voila! The chicken tastes great all by itself, without the help of any butter. But for those of you who love butter and can still eat it happily, I've included the recipe for the cilantro lime butter at the bottom.

Cilantro Lime Chicken
serves 3 to 4 adults

Ingredients:

  • 1 to 1 1/2 lb. boneless skinless chicken breasts that are either kosher or organic
  • juice of 1 lime (2 to 2 1/2 Tbsp.)
  • 2 Tbsp. minced fresh cilantro
  • 1 tsp. minced garlic
  • 1/2 tsp. sea salt
  • 1/4 tsp. black pepper
  • 1 Tbsp. olive oil
Instructions:

Rinse the chicken breasts thoroughly under cold water and place in a quart-size Zip-lock bag. Mince the cilantro and transfer to a small bowl. Add the lime juice, minced garlic, sea salt, and black pepper. Whisk in the olive oil. Pour the marinade into the bag with the chicken breasts. Seal the bag and massage the marinade onto the chicken. Place the bag with the chicken in the refrigerator for at least one hour, but preferably two.

Remove the chicken from the bag and grill until the chicken is done.


Cilantro Lime Butter

Ingredients:
  • 6 Tbsp. unsalted butter, softened
  • 1 tsp. lime zest
  • 1 1/2 tsp. fresh lime juice
  • 1 shallot, minced
  • 3 Tbsp. fresh cilantro, minced
  • 1/4 tsp. sea salt
  • 1/4 tsp. black pepper
  • 1/8 tsp. cayenne pepper
Instructions:

Let the butter soften on the counter top. In a small bowl combine the rest of the ingredients. Then stir in the butter until the ingredients are thoroughly incorporated into the butter. Form the butter into a log or spoon it into an attractive bowl. Place the butter in the refrigerator for at least an hour to let it firm up before serving.

Wednesday, August 31, 2011

Chicken and Sausage Jambalaya


Chicken and sausage jambalaya doesn't make for the greatest picture, but the flavor of the dish more than makes up for its less than stellar appearance. This is great-tasting comfort food. I was inspired to make this when I came across a package of gluten-free, corn-free, soy-free, and dairy-free Andouille smoked sausage at our local Shaw's grocery store. The sausage makes the dish, so if you can't find Andouille sausage, wait until you can before making the jambalaya. I hunted around on the internet until I found this recipe off of which to base my version. Both of the girls really like the jambalaya and don't find it too spicy, even though Michael says it makes his head sweat a bit. And Naomi does ask for extra water to drink with the meal.

Chicken and Sausage Jambalaya
serves 2 adults and 2 children for 2 meals; OR serves 4 to 6 adults

Ingredients:

  • 1 medium yellow onion
  • 2 medium stalks of celery
  • 1/2 green bell pepper
  • 1 tsp. minced garlic
  • 1 tsp. paprika
  • 1/4 tsp. ground black pepper
  • 1/4 tsp. sea salt
  • 1/4 tsp. onion powder
  • 1/8 tsp. garlic powder
  • 1/8 tsp. cayenne powder
  • 1 1/2 lb. boneless, skinless chicken breasts that are organic or kosher.
  • 2 cups Imagine Organic chicken broth OR Trader Joe's Organic free-range chicken broth
  • 1 1/2 liquid cups (which is about 13.5 oz.) pureed tomatoes. Try to use tomatoes without citric acid, such as Pomi strained tomatoes.
  • 1/4 tsp. dried thyme
  • 1/4 tsp. dried oregano
  • 1/2 tsp. brown sugar
  • 6 oz. (half the package) of Aidells Cajun Style Andouille smoked pork sausage
  • 1 bay leaf
  • 1 cup uncooked long-grain white rice
Instructions:

Place a 4-quart pot over medium heat. Finely chop the onion, celery, and bell pepper. Add the canola oil to the pot and let it heat up until it starts shimmering. Then add the vegetables and saute until softened.

While the vegetables are sauteing, measure out the paprika, black pepper, sea salt, onion powder, garlic powder, and cayenne pepper into a small bowl. Thoroughly rinse the chicken breasts and cut into 1/2-inch cubes. When the vegetables are soft, add the minced garlic and stir for about 30 seconds. Then add the spices and stir for 30 seconds. Increase the heat to medium-heat, add the chicken and cook for 2 to 4 minutes, stirring frequently, until the outside of the chicken cubes has cooked and is no longer pink. Then add the chicken broth, tomato puree, dried thyme, dried oregano, and brown sugar to the pot and stir.

While the liquid is coming to a simmer, cut the sausages in half length-wise and then cut them into 1/4-inch pieces width-wise. Rinse the rice thoroughly in cold water. When the liquid in the pot has come to a simmer, stir in the rice, sausage pieces, and bay leaf. Bring to a simmer again. Then reduce the heat to medium-low or low, cover the pot, and let gently simmer for 30 minutes, until the rice is tender and the chicken is cooked through. Stir the contents of the pot once every 10 minutes to make sure that the rice is not sticking to the bottom. After about 30 minutes, take the pot off the heat, remove the bay leaf, and add salt to taste, about 1/4 to 1/2 tsp.

Sunday, August 14, 2011

Chocolate Zucchini Muffins


Since zucchini is in season, I thought I would work on a recipe for zucchini muffins. And what goes better with zucchini than chocolate? This is my new favorite chocolate muffin recipe. The zucchini helps the muffins not to crumble and to stay moist, even the day after they are made. And if you'd like to be a little more decadent, you can turn the muffins into cupcakes by spreading some frosting on top.

Chocolate Zucchini Muffins
makes 6 muffins

Ingredients:
  • 1 cup Bob's Red Mill gluten-free flour
  • 3 Tbsp. unsweetened cocoa powder. I use Ghirardelli brand because I like the flavor.
  • 3/4 tsp. baking soda
  • 1/8 tsp. sea salt
  • 1/2 tsp. Starbuck's decaffeinated Via instant coffee. (This is optional. I like using it because it enhances the chocolate flavor.)
  • 1/2 cup vanilla-flavored rice milk
  • 1 and 1/2 Tbsp. flax seed meal
  • 1/3 cup granulated white sugar
  • 1/2 tsp. vanilla extract. Use Trader Joe's alcohol-free vanilla extract or another vanilla extract that does not have corn syrup and is preferably alcohol-free, since the alcohol could be derived from corn. Recently I have been using Rodelle Vanilla Flavor alcohol free all natural extract, which I found at Stop and Shop.
  • 1/2 Tbsp. apple cider vinegar
  • 3 Tbsp. canola oil
  • 1/2 cup shredded zucchini, packed
  • 1/4 cup dairy-free semi-sweet chocolate chips. The two kinds I use that do not contain milk fat are Trader Joe's semi-sweet chocolate chips and Ghirardelli semi-sweet chocolate chips.
Instructions:

Preheat the oven to 375 degrees. Grease 6 cups of a muffin tin with canola oil. Heat the rice milk in the microwave for about 30 seconds. Stir in the flax seed meal and set aside.

In a medium bowl sift the flour and cocoa powder using a sieve or whisk. Add the baking soda, sea salt, and instant coffee, and stir to combine. In a small bowl mix the sugar, rice milk and flax mixture, canola oil, vanilla extract, and apple cider vinegar. Peel the zucchini and grate onto a plate using the larger holes on a grater. Measure the grated zucchini by packing it firmly into a 1/2 cup measuring cup. Add the grated zucchini to the small bowl with the liquid ingredients and stir to combine. Pour the zucchini and liquid mixture into the medium bowl with the dry ingredients. Stir just until you don't see anymore dry flour. Then fold the chocolate chips into the batter.

Using a 1/3 cup measuring cup, scoop a level 1/3 cup (not heaping) of the batter into each of the 6 cups of the muffin tin. Bake for about 17 to 18 minutes, until a toothpick comes out clean. Use a narrow spatula to loosen the muffins from the tin. Then remove the muffins to let them cool on a wire rack.

Monday, August 8, 2011

Roasted Carrots with Lemon or Orange Glaze


This recipe is perfect for the nights when I don't have any other vegetable in the house besides a bag of baby carrots. As long as I have a lemon or an orange on hand, I can make these roasted carrots, and the girls and Michael are sure to like them. I got the idea from a recipe I found for roasted carrots with lemon dressing. The original recipe uses lemon zest and juice, but I discovered that the carrots taste just as good with orange zest and juice, so I make whichever will taste better with the rest of the dinner.

Roasted Carrots with Lemon or Orange Glaze
serves 2 adults and 2 small children

Ingredients:
  • 1 1/2 lb. baby carrots (1 small bag)
  • 2 Tbsp. olive oil
  • 1/2 tsp. sea salt
  • 2 tsp. honey (or 3 tsp. if you prefer it a bit sweeter)
  • 2 Tbsp. freshly squeezed lemon juice (OR orange juice from a naval orange)
  • zest from 1/2 lemon (OR 1 tsp. orange zest)
Instructions:

Take the baby carrots out of the refrigerator and preheat the oven to 425 degrees. Rinse the carrots and dry them with a towel. If any of the carrots are thicker than your pinkie finger, cut them in half. Transfer the carrots to a medium-size bowl and pour the olive oil over them. Toss them with the olive oil and spread them in a single layer on a baking sheet.

Cover the baking sheet tightly with aluminum foil and put the pan in the oven for 15 minutes. Then remove the foil and bake until the carrots are browned and tender, stirring them every 10 minutes. This will take about 20 to 30 minutes.

If you are pressed for time, move the tray to the upper-middle rack position and increase the temperature to 450 degrees. Then it should take less time, but check the carrots more frequently to avoid having some get charred. The other trick for reducing the preparation time is, while the oven is preheating, to microwave the oil-covered carrots until they are tender. Then roast the carrots uncovered on the upper-middle oven rack.

While the carrots are roasting, zest the lemon or orange. Squeeze the juice of the lemon or orange through a strainer and into a cup. In a small bowl whisk together the zest, 2 tablespoons juice, salt, and honey. Set the glaze aside until the carrots are ready.

When the carrots are done, transfer them to a serving bowl. Pour the glaze over the carrots, toss to coat, and serve.

Friday, July 29, 2011

North Conway, NH


A couple of weeks ago Michael's parents came to visit and we all drove up to North Conway to spend the weekend there. We had a great time together going swimming, hiking, and having fun at Story Land. At Story Land itself the only things Michael could eat were the cotton candy and freshly squeezed lemonade. Fortunately, Michael likes cotton candy and lemonade, so he didn't mind snacking on those for a few hours. And the girls were more than willing to help him with the cotton candy. The next time we go I need to remember to pack Michael a sandwich, though, so he has something a little healthier to balance out all of the sugar.

We also had a great time going out to eat together. For dinner we really enjoyed going to The Black Cap Grille, which had several gluten-free dinner options and Michael's favorite gluten-free beer, Bard's. The restaurant even offered gluten-free buns so that Michael could have a hamburger, his first at a restaurant in years. For lunch we went to A Taste of Thai restaurant, which had excellent service, nice ambiance, and great-tasting Thai food. For being in the mountains of New Hampshire, I was really pleased with finding two family-friendly restaurants where we all enjoyed going to eat. The next time we visit I'd like to check out Shalimar of India, which also looks like a good option for us.

Wednesday, July 27, 2011

Grilled Pork Tenderloin with Orange Rub


I don't know why it took me so long to start grilling pork tenderloin. It's so good, and it's less expensive than a similar cut of beef or the all-natural chicken breast we have to buy. I asked my friend Jenn for her pork tenderloin recipe because Michael and I liked it so much when she made it for us. It's originally a Cooks' Illustrated recipe, but I tweaked it a little, based on what I usually have on hand in the kitchen. The tricky thing is, now that we have one pork tenderloin recipe that we really like, will we be able to find another recipe that we like just as well?

The recipe below is for two adults and two small children. If you want to feed four adults, buy a tenderloin that is at least 1 1/2 lb., and double the brine and the wet rub. For four adults and 2 or more children, buy 2 1-lb. tenderloins and double the recipe.

Grilled Pork Tenderloin with Orange Rub
serves 2 adults and 2 small children

Ingredients:

  • 1 lb. pork tenderloin
  • 1 cup hot water
  • 1/4 cup + 2 Tbsp. granulated white sugar
  • 2 1/2 tsp. sea salt
  • 1 cup cold water
  • zest of 1 large naval orange
  • 1 tsp. minced garlic
  • 1/2 Tbsp. extra-virgin olive oil
  • 1/2 Tbsp. honey
  • 1/4 tsp. black pepper
  • 1/8 tsp. sea salt
Instructions:

Two hours before you want to serve the tenderloin, rinse it thoroughly under cold water and remove all silver skin. In a medium-size bowl, stir together the hot water, sugar, and sea salt until the sugar and salt have dissolved. Then stir in the cold water. Submerge the tenderloin in the brine, cover the bowl with plastic wrap, and refrigerate for 1 hour.

In a small bowl make the rub by mixing together the orange zest, minced garlic, olive oil, honey, pepper, and salt. Remove the pork from the brine, rinse it well, and dry it thoroughly with paper towels. Rub the tenderloin all over with the orange rub.

Cook the pork on the grill over medium-high heat with the lid closed for 3 to 4 minutes per side for the first 3 sides, until each side is nicely browned. Cook the fourth side over medium heat for about 2 minutes, or until an instant-read thermometer registers 155 degrees and the meat is slightly pink in the center. Place the pork on a plate and cover loosely with aluminum foil for 5 minutes. Then cut the pork into 1-inch wide pieces and serve.

Friday, July 15, 2011

Charlottesville, VA (#2)


Michael and I went to the Charlottesville area again this summer to celebrate our wedding anniversary while my wonderful parents watched the girls. This year we spent less time hiking in the heat and humidity and more time wine-tasting in the nice air-conditioned tasting rooms. I don't know that my palate is any more refined than it was before the trip, but I can say that I still prefer red wine to white wine, except for the sweet white wines and ice wines. Our favorite vineyard in the area is still Veritas Vineyard and Winery, which we have gone back to every year that we've visited Charlottesville. The wine is consistently of high quality, and the grounds are beautiful.

This year we stayed at Le Bleu Ridge Bed and Breakfast, which is south-west of Charlottesville. The room was great, the owners of the bed and breakfast were very friendly, and the breakfasts were amazing. They consisted of three courses, none of which contained any wheat or corn. The first morning we had fresh fruit, frittata, salad, and coconut rice pudding. The second morning we had scones, salad, breakfast sausages, and berry-filled crepes. Danielle, one of the owners, even gave us some leftover fruit and scones to take with us on the road.

For the rest of our meals we decided to try out some more restaurants in Charlottesville. For lunch we wanted to go to Lemon Grass, a Thai restaurant that has great reviews and carefully labels which items on the menu are gluten-free. Unfortunately, the restaurant was closed the day we were there. However, we had great success with our dinner choices. The first night we went to Hamiltons', which is on the downtown mall, the outdoor pedestrian area. It was a great place for a special dinner date, and I'd love to go back to try out more of the entrees and desserts. The second night we went to Duner's, a restaurant that several locals recommended to us. The interior looked like a rustic beach shack with plain wooden booths and tables. With curiosity and amusement we watched as more and more Mercedes pulled into the parking lot and the restaurant was packed by 7 pm. However, once our meal arrived, we knew why. The food was high quality and the portions were large. I thoroughly enjoyed my seared duck breast with asparagus spaetzle and peach-citrus glaze.

Saturday, July 9, 2011

Carrot Spice Muffins (egg-free)


I thought I was done coming up with muffin varieties since I have several that the girls and I enjoy. However, the mood came over me to try something new, so I decided to experiment with egg-free carrot muffins. At first I used cinnamon and nutmeg to flavor the muffins, but that combination didn't taste quite right to me. Then I realized that I wanted something a little different and subtler, so I tried using cardamom with a bit of cinnamon. Wow. This flavor combination is so good that I'm willing to peel and grate two carrots first thing in the morning to make these muffins.

Carrot Spice Muffins
makes 6 muffins

Ingredients:

  • 1/2 cup rice milk. I used Trader Joe's vanilla rice drink or vanilla flavored Rice Dream.
  • 1 Tbsp. flax seed meal. I use Bob's Red Mill brand.
  • 1 cup and 2 Tbsp. Bob's Red Mill gluten-free flour
  • 3/4 tsp. baking soda
  • 1/8 tsp. sea salt
  • 1/4 tsp. ground cinnamon
  • 1/2 tsp. ground cardamom
  • 1/4 cup granulated white sugar
  • 3 Tbsp. canola oil
  • 1/2 tsp. vanilla extract. Use Trader Joe's alcohol-free vanilla extract or another vanilla extract that does not have corn syrup and is preferably alcohol-free, since the alcohol could be derived from corn. Recently I have been using Rodelle Vanilla Flavor alcohol free all natural extract, which I found at Stop and Shop.
  • 1/2 Tbsp. (which is 1 and 1/2 tsp.) apple cider vinegar
  • 1/2 cup finely grated carrots, packed (about 2 small to medium size carrots)
Instructions:

Preheat the oven to 375 degrees. Grease 6 cups of a muffin tin with canola oil. Heat the rice milk in the microwave for about 30 seconds. Stir in the flax seed meal and set aside.

In a medium bowl sift the flour using a sieve or whisk. Add the baking soda, sea salt, cinnamon, and cardamom, and stir to combine. In a small bowl mix the sugar, rice milk and flax mixture, canola oil, vanilla extract, and apple cider vinegar. Peel the carrots and grate them onto a plate using the smaller holes on a grater. Measure the grated carrot by packing it firmly into a 1/2 cup measuring cup. Add the grated carrot to the small bowl with the liquid ingredients and stir to combine. Then pour the carrot and liquid mixture into the medium bowl with the dry ingredients. Stir just until you don't see anymore dry flour.

Scoop the batter evenly into the cups of the muffin tin and bake for 18 minutes, or until the muffins are golden on top and a toothpick comes out clean. Use a narrow spatula to loosen the muffins from the tin. Then remove the muffins to let them cool on a wire rack.

Monday, June 20, 2011

Hanover, NH


Michael, the girls, and I went up to Hanover on Saturday, June 18th, for my 10-year college reunion. (Technically, it was my 11-year reunion, but Dartmouth groups three classes together for a "10-year" reunion.) It was great having a picnic lunch on the green, spending time with a couple of my close college friends, and walking around campus and along Pine Park.

After the walk we wanted something refreshing for snack, so we decided to try out the new gelato shop on Main Street. I was so excited that they had two flavors that were dairy-free, egg-free, and corn-free, so we could all enjoy the gelato together. The flavor of the strawberry gelato was especially nice. And the texture was more like soft-serve ice cream, not as icy or cold as regular ice cream or sorbet. Even Naomi, who refuses to eat ice cream or anything too cold, liked it!


Finally, before heading home we went to dinner at the Jewel of India, an Indian restaurant that Michael and I frequented while dating. The food tasted great, but unfortunately the restaurant puts cream or yogurt in almost everything. The next time we visit Hanover, I might want to try going to Mai Thai, another restaurant on Main Street that Michael and I used to go to. Lui Lui in West Lebanon now has a gluten-free menu, so we could also go there.

Going to the Upper Valley reminded me of the many excellent restaurants that Michael took me to on dates when we lived there. Unfortunately, not very many of them are suitable for children. (I.e., if we're going to spend that much money on dinner, we don't want to take our children, as wonderful as they are.) If we ever go back just the two of us, at the top of my list would be to go to Zins, Simon Pearce, or the Parker House Inn. In the mean time, I'll think with fond memories of our picnic on the green and the lovely strawberry gelato.

Friday, June 17, 2011

Sunflower Seed Butter and Maple Cookies


Isn't the color of these cookies awesome? The green inside is due to a chemical reaction of the sunflower seed butter, maple syrup, and baking soda. I think it's great. The flavor of the cookies is great, too. This recipe is based on one in The Allergen-Free Baker's Handbook; however, I modified it to make it corn-free. I've been working on this recipe because the last time I visited my mom, she asked if I had a sunflower seed butter cookie recipe to use up the rest of the jar that she had bought for Sabrina and Naomi's sandwiches. I didn't have a recipe at the time, and I wanted to come up with one before our next visit. So here it is. I really like the combination of the sunflower seed butter, maple syrup, and cinnamon. I added the chocolate chips because a bit of chocolate makes most cookies better. And the cool green color is just a bonus.

Sunflower Seed Butter and Maple Cookies
makes about 24 cookies

Ingredients:

  • 1 cup Bob's Red Mill gluten-free flour
  • 1/2 tsp. baking soda
  • 1/2 tsp. ground cinnamon
  • 3/4 cup sunflower seed butter
  • 3/4 cup pure maple syrup. I like using grade B because it has more flavor.
  • 2 Tbsp. flax seed meal. I use Bob's Red Mill brand.
  • 1 tsp. vanilla extract. Use Trader Joe's alcohol-free vanilla extract or another vanilla extract that does not have corn syrup and is preferably alcohol-free, since the alcohol could be derived from corn. Recently I have been using Rodelle Vanilla Flavor alcohol free all natural extract, which I found at Stop and Shop.
  • 1/2 cup dairy-free semi-sweet chocolate chips. The two kinds I use that do not contain milk fat are Trader Joe's semi-sweet chocolate chips and Ghirardelli semi-sweet chocolate chips.
Instructions:

Preheat the oven to 375 degrees. Line a baking sheet with parchment paper. In a small bowl sift the flour, baking soda, and cinnamon. I shake the ingredients through a sieve or stir them using a wire whisk. Measure the sunflower seed butter using solid measuring cups and scrape it into a medium size microwave-safe bowl. If your sunflower seed butter is refrigerated, microwave it for about 30 seconds to warm it up. Measure the maple syrup using a liquid measuring cup. Add the maple syrup, flax seed meal, and vanilla extract to the bowl, and stir. Next stir in the dry ingredients until no trace of flour remains. Then stir in the chocolate chips.

Using a cookie scooper or a tablespoon measuring spoon, scoop the dough and place it on the baking sheet, keeping a couple of inches between scoops of dough. Press down slightly on the balls of dough. If you use a small scooper, then you'll need two baking sheets and the recipe will make about 24 small cookies. Bake the sheets one at a time in the middle of the oven for 10 minutes each. Let the cookies cool on the baking sheet for 5 minutes before transferring them to a wire rack to continue cooling.

Sunday, June 12, 2011

Thai Coconut Curry Noodles with Chicken


Here is a fun recipe that uses Thai-style rice stick noodles. I bought a bag of them at Trader Joe's and wanted to find a recipe in which to use them. They're thick, not thin, rice noodles that take about 8 to 10 minutes to cook. I like this recipe because as the noodles cook, they absorb the flavors of the chicken broth, coconut milk, and spices. At first I followed the original recipe and cooked the noodles with broccoli slaw. That was fine, but broccoli slaw can be expensive if you buy it in a bag, and I'm too lazy to make my own. Plus, the broccoli slaw sometimes was still a bit too crunchy when the noodles were done cooking. Then I tried substituting the slaw with carrots, peas, and water chestnuts. This vegetable combination was colorful and tasted great, so I think I'm going to make it this way from now on.

Thai Coconut Curry Noodles with Chicken
serves 2 adults and 2 small children

Ingredients:
  • 1 to 2 Tbsp. canola oil
  • 1 medium onion
  • 2 medium carrots
  • 1 Tbsp. red curry paste. I use Thai Kitchen brand because it's labeled gluten-free.
  • 1 tsp. ground ginger
  • 1/2 tsp. ground coriander
  • 1/4 tsp. ground turmeric (optional)
  • 1/2 lb. boneless, skinless chicken breasts that are kosher or organic (about 1 to 2 breasts, depending on their size)
  • 1 1/2 cups Imagine organic chicken broth OR Trader Joe's organic free-range chicken broth
  • 1 14-ounce can light coconut milk. Try to get one that contains just coconut milk, water, and guar gum.
  • 1 tsp. brown sugar
  • 1/2 tsp. sea salt
  • 1 and 1/2 tsp. fish sauce
  • about 6.5 ounces (half a package) of traditional Thai-style rice sticks
  • 1/2 cup frozen peas
  • 1 8-ounce can of sliced water chestnuts, drained
  • 1 Tbsp. lime juice
Instructions:

Place a 4-quart pot over medium heat. Chop the onion. Peel the carrots and cut them into thin coins. Add the canola oil to the pot and heat the oil until shimmery. Then add the onion and carrots and saute until the onion is tender. While the vegetables are sauteing, thoroughly rinse the chicken breasts, cut them in half length-wise, and then cut them into thin strips width-wise. When the onion is softened, add the red curry paste, ginger, coriander, and turmeric to the pot. Stir for about 1 minute. Increase the heat to medium-high, add the chicken to the pot and cook, stirring frequently, for about 3 to 4 minutes, until the outside of the chicken has cooked.

Pour the chicken broth and coconut milk into the pot. Stir in the brown sugar, sea salt, and fish sauce. Bring the liquid to a simmer. Then rinse the rice noodles in cold water. (If I don't do this, Michael sometimes has an allergic reaction to something coating the noodles.) Break the noodles in half, put them in the pot, and set the timer for 10 minutes. Stir constantly for about a minute so that the noodles don't stick to each other or to the bottom of the pot. Lower the heat to medium or medium-low so that the liquid simmers but doesn't boil vigorously. Stir frequently while the noodles cook. After the noodles are done cooking, turn the heat off and stir in the peas, drained water chestnuts, and lime juice.

Saturday, June 4, 2011

Chocolate Mug Cake


This dessert is for days when you want to have a dessert RIGHT NOW. It's also for days when it's way too hot to turn on the oven, like it was for us last week. The only not-so-quick part about the original recipe was that it called for coffee to enhance the chocolate flavor. We're tea drinkers here, not coffee drinkers, so we don't usually even have coffee beans in the house. Fortunately, I discovered a fast solution when I want to add a bit of coffee flavor to my chocolate dessert. The new Starbucks instant coffee called Via is 100% microground coffee without any corn products added, unlike most other instant coffees. So now, from start to finish, I can have my chocolate cake with a hint of coffee in just 15 minutes. If you are a coffee drinker and usually have some in the house, just use coffee instead of the water in the recipe and omit the instant coffee granules.

Chocolate Mug Cake
serves 2 adults

Ingredients:
  • 2 Tbsp. (or more) dairy-free semi-sweet chocolate chips. The two kinds I use that do not contain milk fat are Trader Joe's semi-sweet chocolate chips and Ghirardelli semi-sweet chocolate chips.
  • 1/4 cup Bob's Red Mill gluten-free flour
  • 2 Tbsp. Ghirardelli unsweetened cocoa
  • 1/4 tsp. baking soda
  • pinch of sea salt
  • 1/4 tsp. Starbucks Via Ready Brew instant coffee (optional -- or use 1/2 tsp. if you like a more pronounced coffee flavor)
  • 3 1/2 Tbsp. light brown sugar
  • 2 Tbsp. unsweetened applesauce
  • 2 1/2 Tbsp. water (or coffee)
  • 1/2 tsp. apple cider vinegar
  • 1/4 tsp. vanilla extract. Use Trader Joe's alcohol-free vanilla extract or another vanilla extract that does not have corn syrup and is preferably alcohol-free, since the alcohol could be derived from corn. Recently I have been using Rodelle Vanilla Flavor alcohol free all natural extract, which I found at Stop and Shop.
Instructions:

Take 2 mugs or 7-ounce ramekins and sprinkle 1 tablespoon of chocolate chips (or more if you would prefer) in the bottom of each. In a small bowl whisk together the flour, unsweetened cocoa, baking soda, sea salt, and instant coffee. In a separate bowl combine the brown sugar, applesauce, water, apple cider vinegar, and vanilla extract. Stir the dry ingredients into the wet ones. Divide the batter evenly into the two mugs. Place the mugs in the microwave and heat on high for 1 minute 10 seconds. Remove the mugs from the microwave and let cool for 5 minutes before serving.

Friday, May 27, 2011

Berry Pudding Cake


I really like pies, especially strawberry rhubarb pie. However, pies require some effort to make and even more waiting time while they bake and cool. Often when I want a dessert, I want it now. . . or at least within an hour of starting to make it. So I was looking for a new dessert that would contain strawberries and rhubarb and be just as tasty as a pie, but that would be much simpler and faster. Then I came across a recipe for berry pudding cake. I tried it, and it's my new favorite berry dessert. Michael liked it well enough that he was willing to help with taste-testing, three times over the past couple of weeks. We had to try the cake with strawberries and rhubarb, just strawberries, and rhubarb and blueberries. I wouldn't want to suggest a berry combination without knowing if it would taste good, right? All three were great, so just use whatever kind of berries is in season, or you can even use frozen berries. I used some blueberries that I had frozen from last summer, and the cake turned out just as good. The original recipe calls for orange zest, but I decided to use lemon since we really like the combination of lemon and fruit.

Berry Pudding Cake
serves 4 adults

Ingredients:

  • 2 packed cups of fresh berries (like blueberries, raspberries, blackberries, or sliced strawberries -- for strawberries it equals 16 oz.) OR 1 packed cup of berries and 1 cup of rhubarb (about 1 to 2 stalks, depending on their size)
  • 1/2 cup and 1 or 2 Tbsp. granulated white sugar
  • 2 eggs
  • 1/2 tsp. vanilla extract. Use Trader Joe's alcohol-free vanilla extract or another vanilla extract that does not have corn syrup and is preferably alcohol-free, since the alcohol could be derived from corn. Recently I have been using Rodelle Vanilla Flavor alcohol free all natural extract, which I found at Stop and Shop.
  • zest from 1 lemon
  • 1/2 Tbsp. olive oil
  • 1/2 cup Bob's Red Mill gluten-free flour
  • 1/8 tsp. sea salt
  • 1/8 tsp. baking soda
  • 1/4 tsp. cream of tartar
Instructions:

Preheat the oven to 350 degrees. Grease an 8x8" Pyrex pan lightly with olive oil. Rinse the berries and rhubarb. If using strawberries, cut the tops off and cut them into slices. If using rhubarb, cut the ends off the stalks, cut the stalks in half length-wise, and then cut them width-wise into 1/4"-wide pieces. (If you cut them thicker than this, they may end up still crunchy at the end of the baking time.) If using tart berries or rhubarb, place all of the fruit in a medium bowl and toss with 1 to 2 tablespoons of sugar. Then transfer the berries to the Pyrex pan and spread evenly over the bottom of the pan.

In a small bowl, whisk together the flour, salt, baking soda, and cream of tartar. Zest the lemon and set aside. In a second medium bowl add the sugar, vanilla extract, olive oil, lemon zest, and eggs. Whisk for 1 minute, until the egg mixture is lighter in color and frothy. Then whisk in the flour mixture until just combined. Carefully pour the batter over the fruit. Put the pan in the oven and bake for 30 minutes. Let the cake cool for 10 minutes before serving. If you would like, you can serve the cake with powdered sugar. (Most powdered sugar contains corn, so we just ate the cake without it.)

Thursday, May 19, 2011

Red Cabbage and Carrot Salad


For a while I've been playing around with a cold red cabbage salad. The problem at first was that when I just marinated the red cabbage in the vinaigrette, the cabbage stayed quite tough and hard to chew, even when shredded thinly. Then I found out about the technique of soaking shredded cabbage in salt water before marinating it. The difference was amazing. After soaking and then marinating, the cabbage had just the right amount of firmness and chew. (The salt water also works to kill any small bugs or other living organisms hiding out in the cabbage, but I don't like to think about that aspect too much.)

Regarding the marinade, I discovered over time that a combination of red wine vinegar and balsamic vinegar worked best with the flavor of the red cabbage. I use 2 tablespoons of red wine vinegar and 1 tablespoon of balsamic, but if you prefer your vinaigrette a little sweeter, you could try reversing the amounts. I don't add any sugar and instead use grated carrot and raisins or craisins to provide a bit of sweetness to the salad.

Red Cabbage and Carrot Salad
serves 4 adults

Ingredients:
  • 8 oz. (1/2 lb.) red cabbage
  • 1 Tbsp. kosher salt
  • 1 medium or 2 small carrots
  • 2 Tbsp. red wine vinegar
  • 1 Tbsp. balsamic vinegar
  • 1/2 tsp. sea salt
  • 2 Tbsp. canola oil
  • 1/4 cup raisins or craisins
Instructions:

Cut the red cabbage into thin shreds. Place the shredded cabbage in a medium bowl and add enough cold water to cover the cabbage. Stir in the kosher salt and let sit on the counter for 15 minutes. While the cabbage is soaking, peel the carrots and grate them using the large holes on a grater. Set the carrot aside. In a small bowl, whisk together the red wine vinegar, balsamic vinegar, sea salt, and canola oil.

After the cabbage has soaked for 15 minutes, drain it in a colander and rinse it thoroughly with cold water. Transfer the cabbage back to the medium bowl. Stir in the grated carrot and toss with the vinaigrette. Cover with saran wrap and place in the refrigerator to marinate for at least 30 minutes, but preferably 1 hour. Right before serving stir in the raisins or craisins.